Get Started with ManageXR
If you are reading this, it means you’ve just started your free trial with ManageXR, and you’re one step closer to seamless XR device management!
This guide will walk you through using the most popular ManageXR features, along with providing sample content you can use to build configurations and remotely manage your devices.
You’ll see what’s possible with ManageXR so that you can take your XR program to new heights.
How ManageXR works
Using a device management platform is the best way to manage XR devices at scale. Once your devices are registered with ManageXR, all device management is done through the platform. Instead of manually putting on each headset, downloading each necessary application and file, and toggling desired settings, ManageXR lets you bundle your content and settings into a configuration, which you can then bulk-deploy to your entire fleet of devices.
You can switch your devices between configurations, edit configurations, and send commands to remotely control devices.
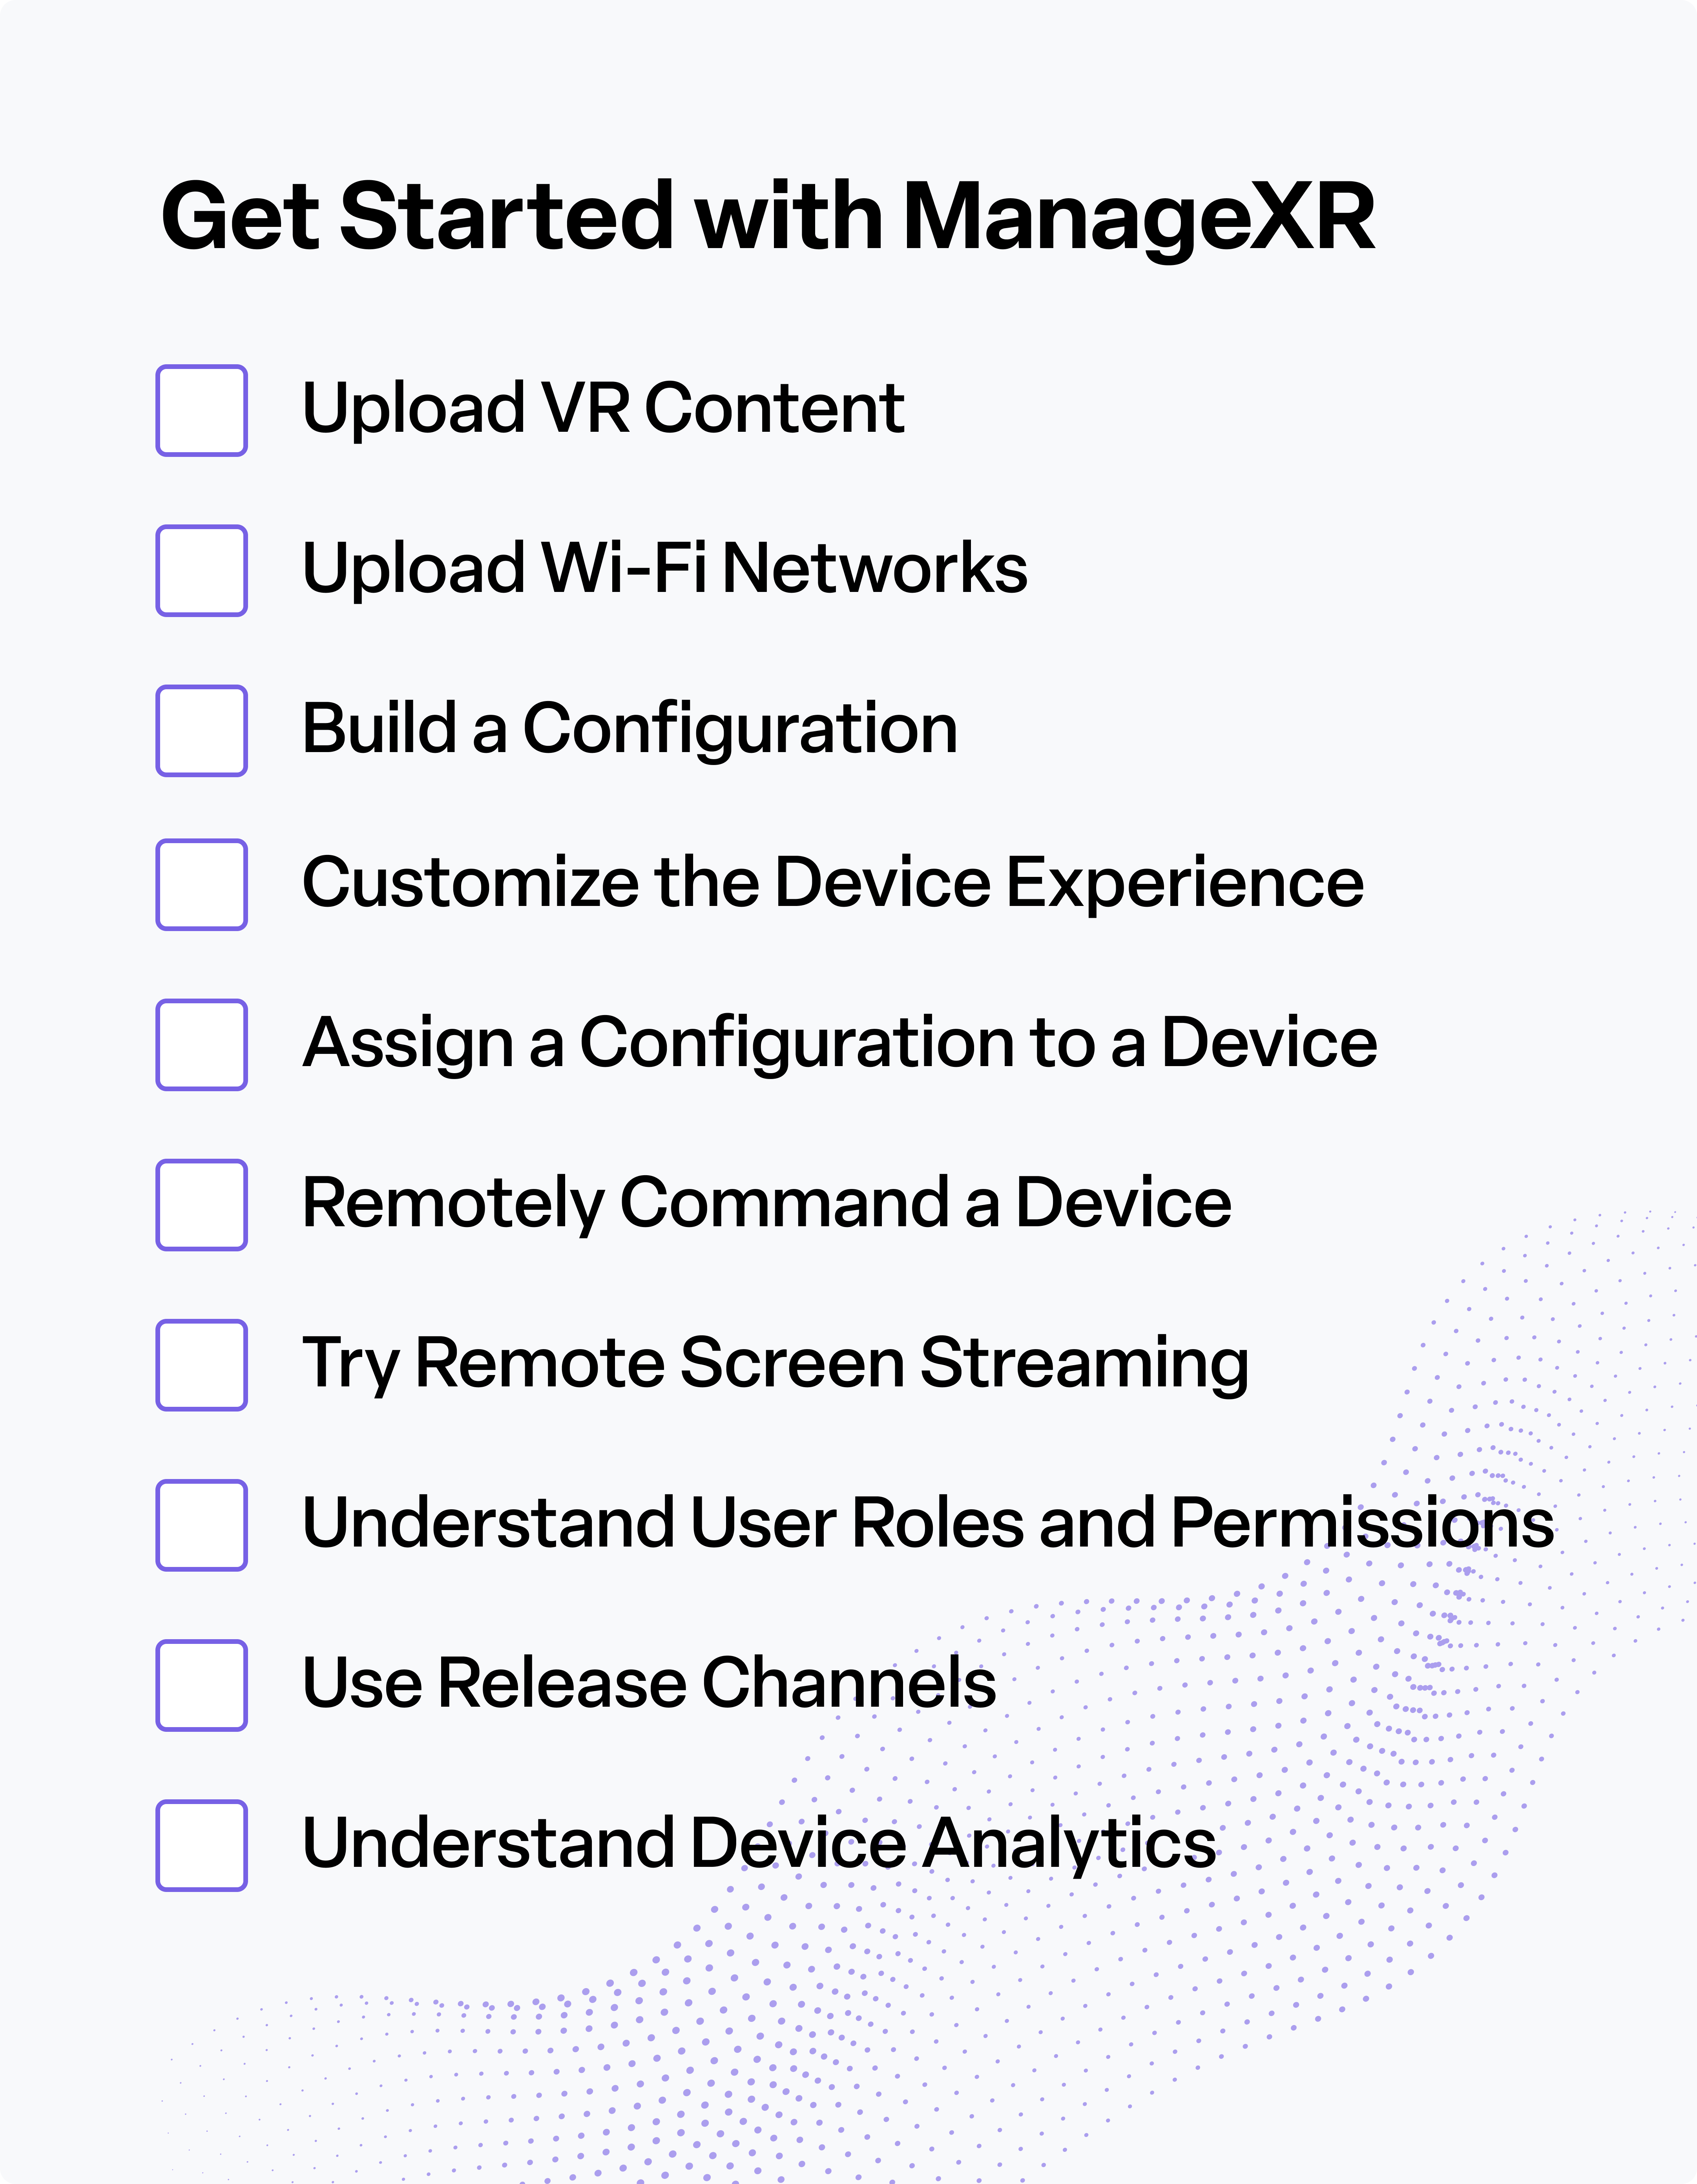
This guide will explain:
- How to upload VR content to ManageXR
- How to upload Wi-Fi networks to ManageXR
- How to build and customize a configuration
- How to assign a configuration to your device
- How to remotely control your device with remote commands
- How to run a guided VR session with Rooms
- ManageXR user roles and permissions
- Developer tools for advanced device control
- Device analytics for fleet visibility
The first step is to register your device with ManageXR, allowing you to manage your devices remotely. Follow the registration steps here for non-Meta (Pico, HTC, etc) and Meta devices.
Once your device is registered and listed on your ManageXR account, you are ready to take full advantage of device management.
Upload VR Content
Before we can begin building configurations, we need to assemble our basic building blocks, starting with VR content.
VR content can be VR applications, 180 or 360-degree videos, WebXR links, and supplementary files for XR applications. For this guide, we’ll demonstrate how to upload an APK file, the most common type of file for XR applications.
To add content to your configuration, you first need to add content to your VR content library. We use a VR content library so you have one organized location to track and update your apps and files as needed.
We’ll start with adding a sample app to your content library. Download this APK file, named App A - v1.apk.
In the VR content library under “App”, choose “Select .apk” and upload the APK file you just downloaded.
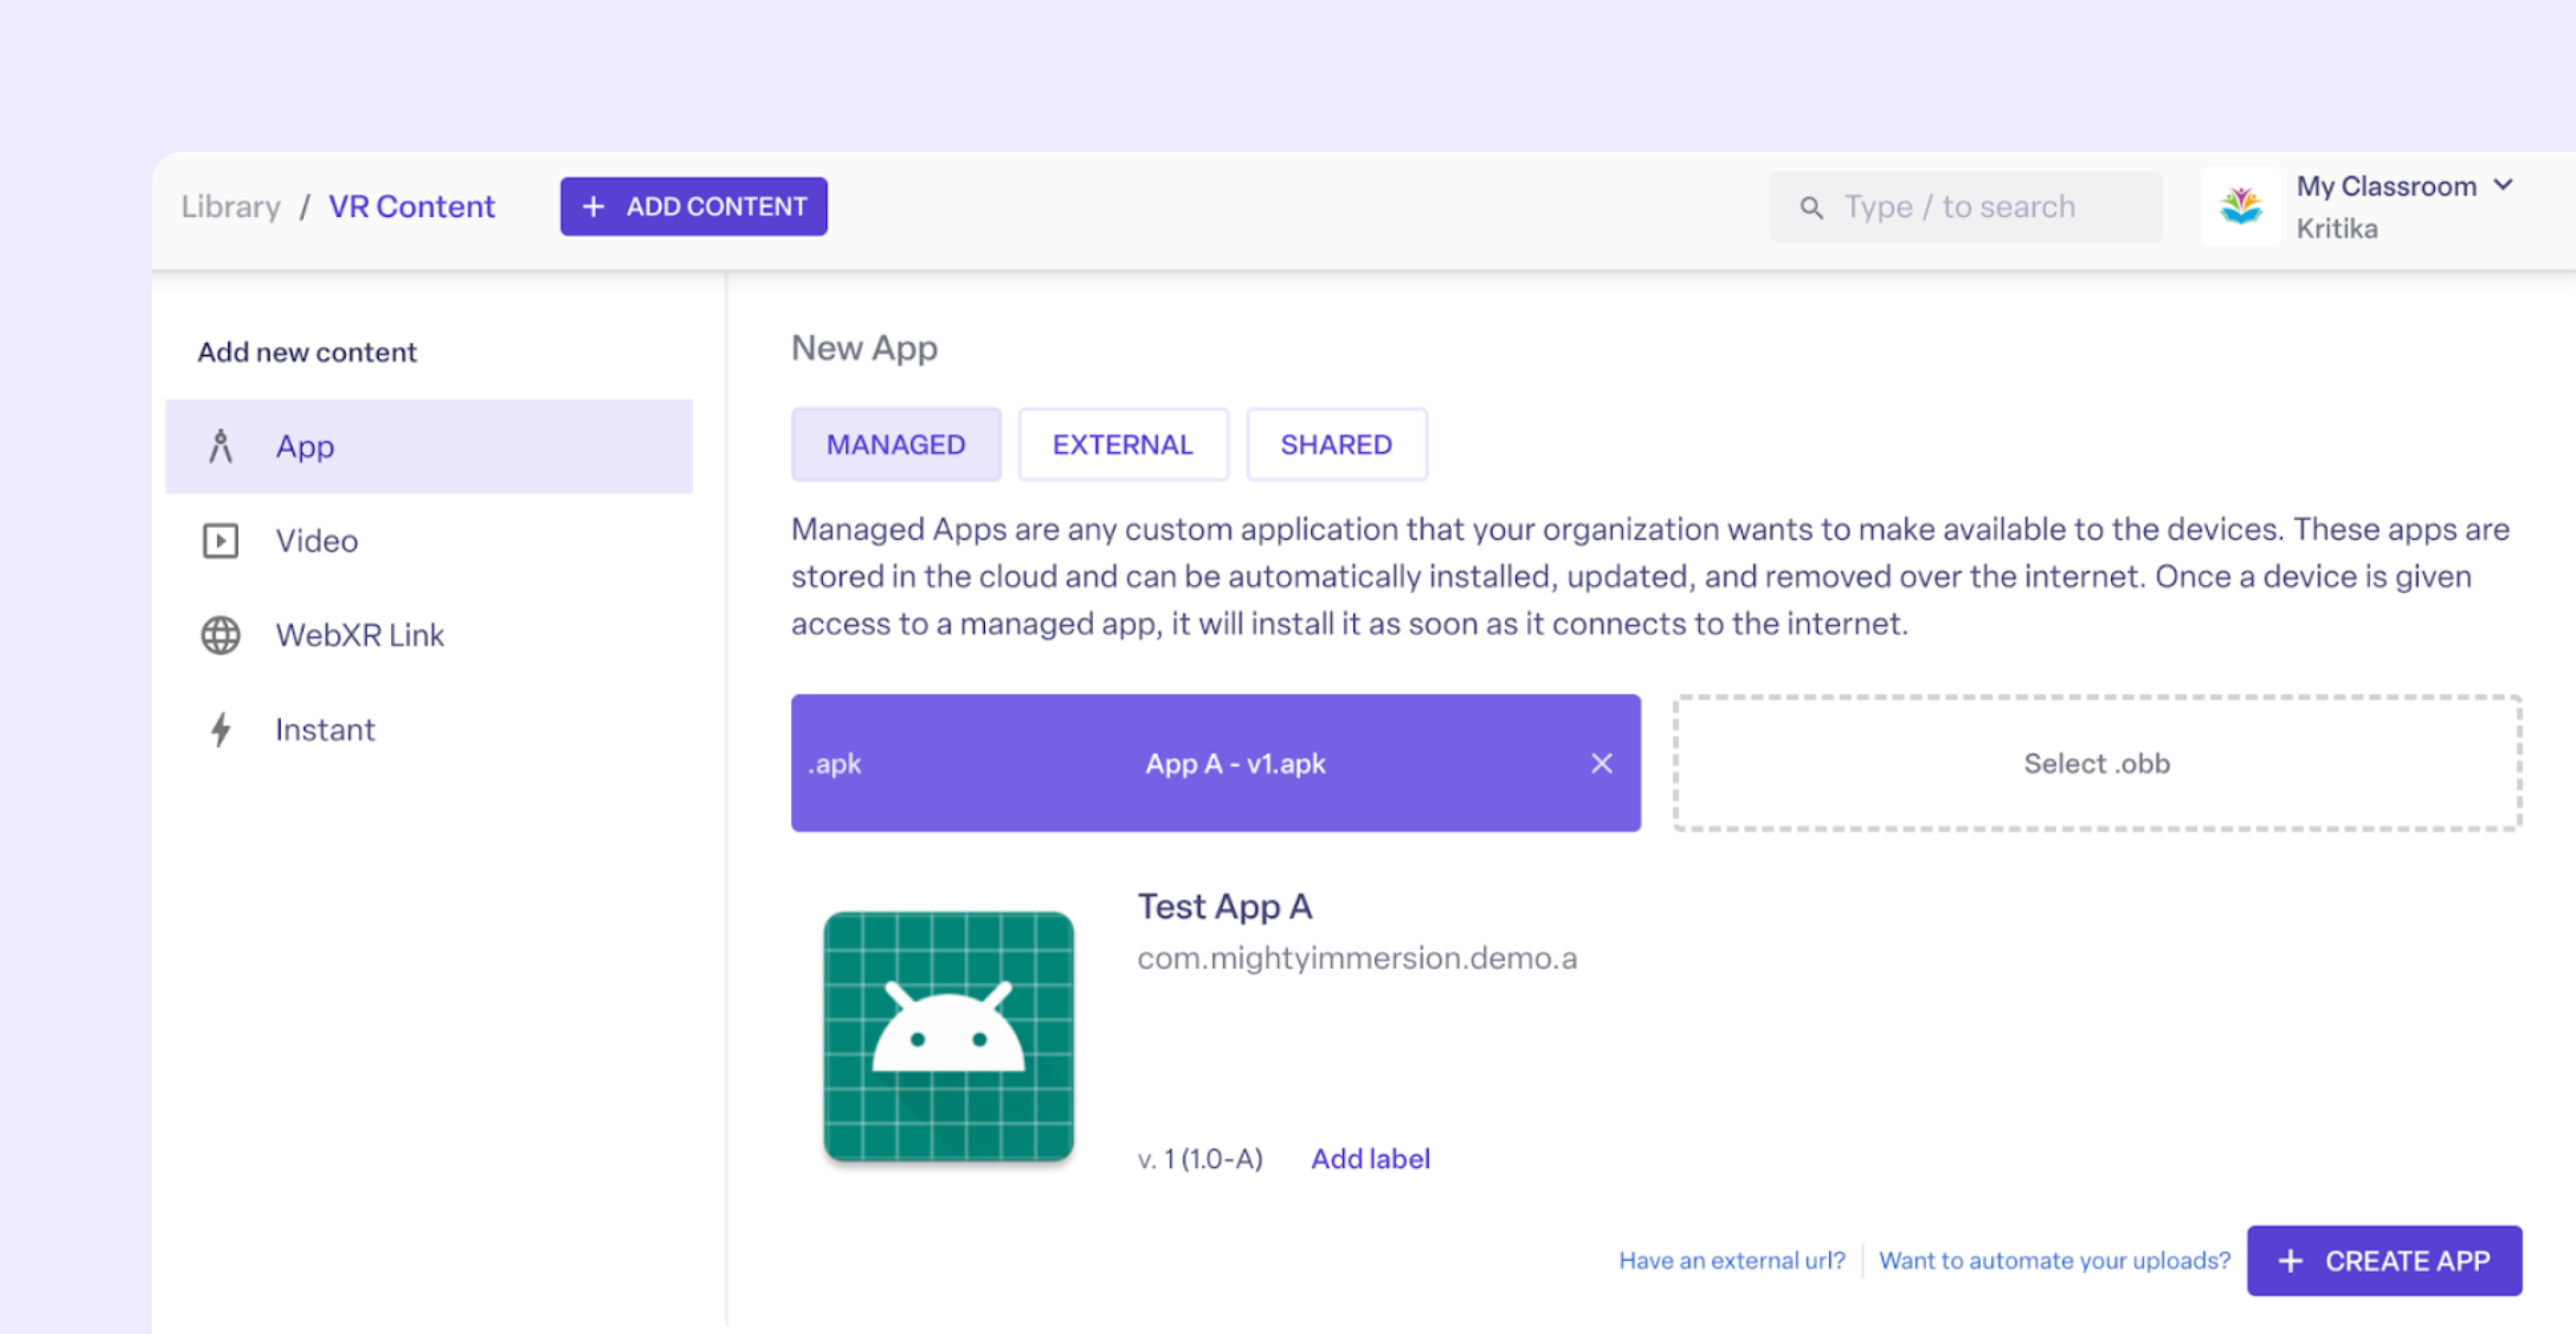
Then, click “Create App”. Now, you can find your app in your app library under “Managed App”. Managed Apps are any custom application that your organization wants to make available to its devices. These apps are stored in the cloud and can be automatically installed, updated, and removed over the internet. Once a managed app is deployed to a device via configurations, it will install it as soon as it connects to the internet.
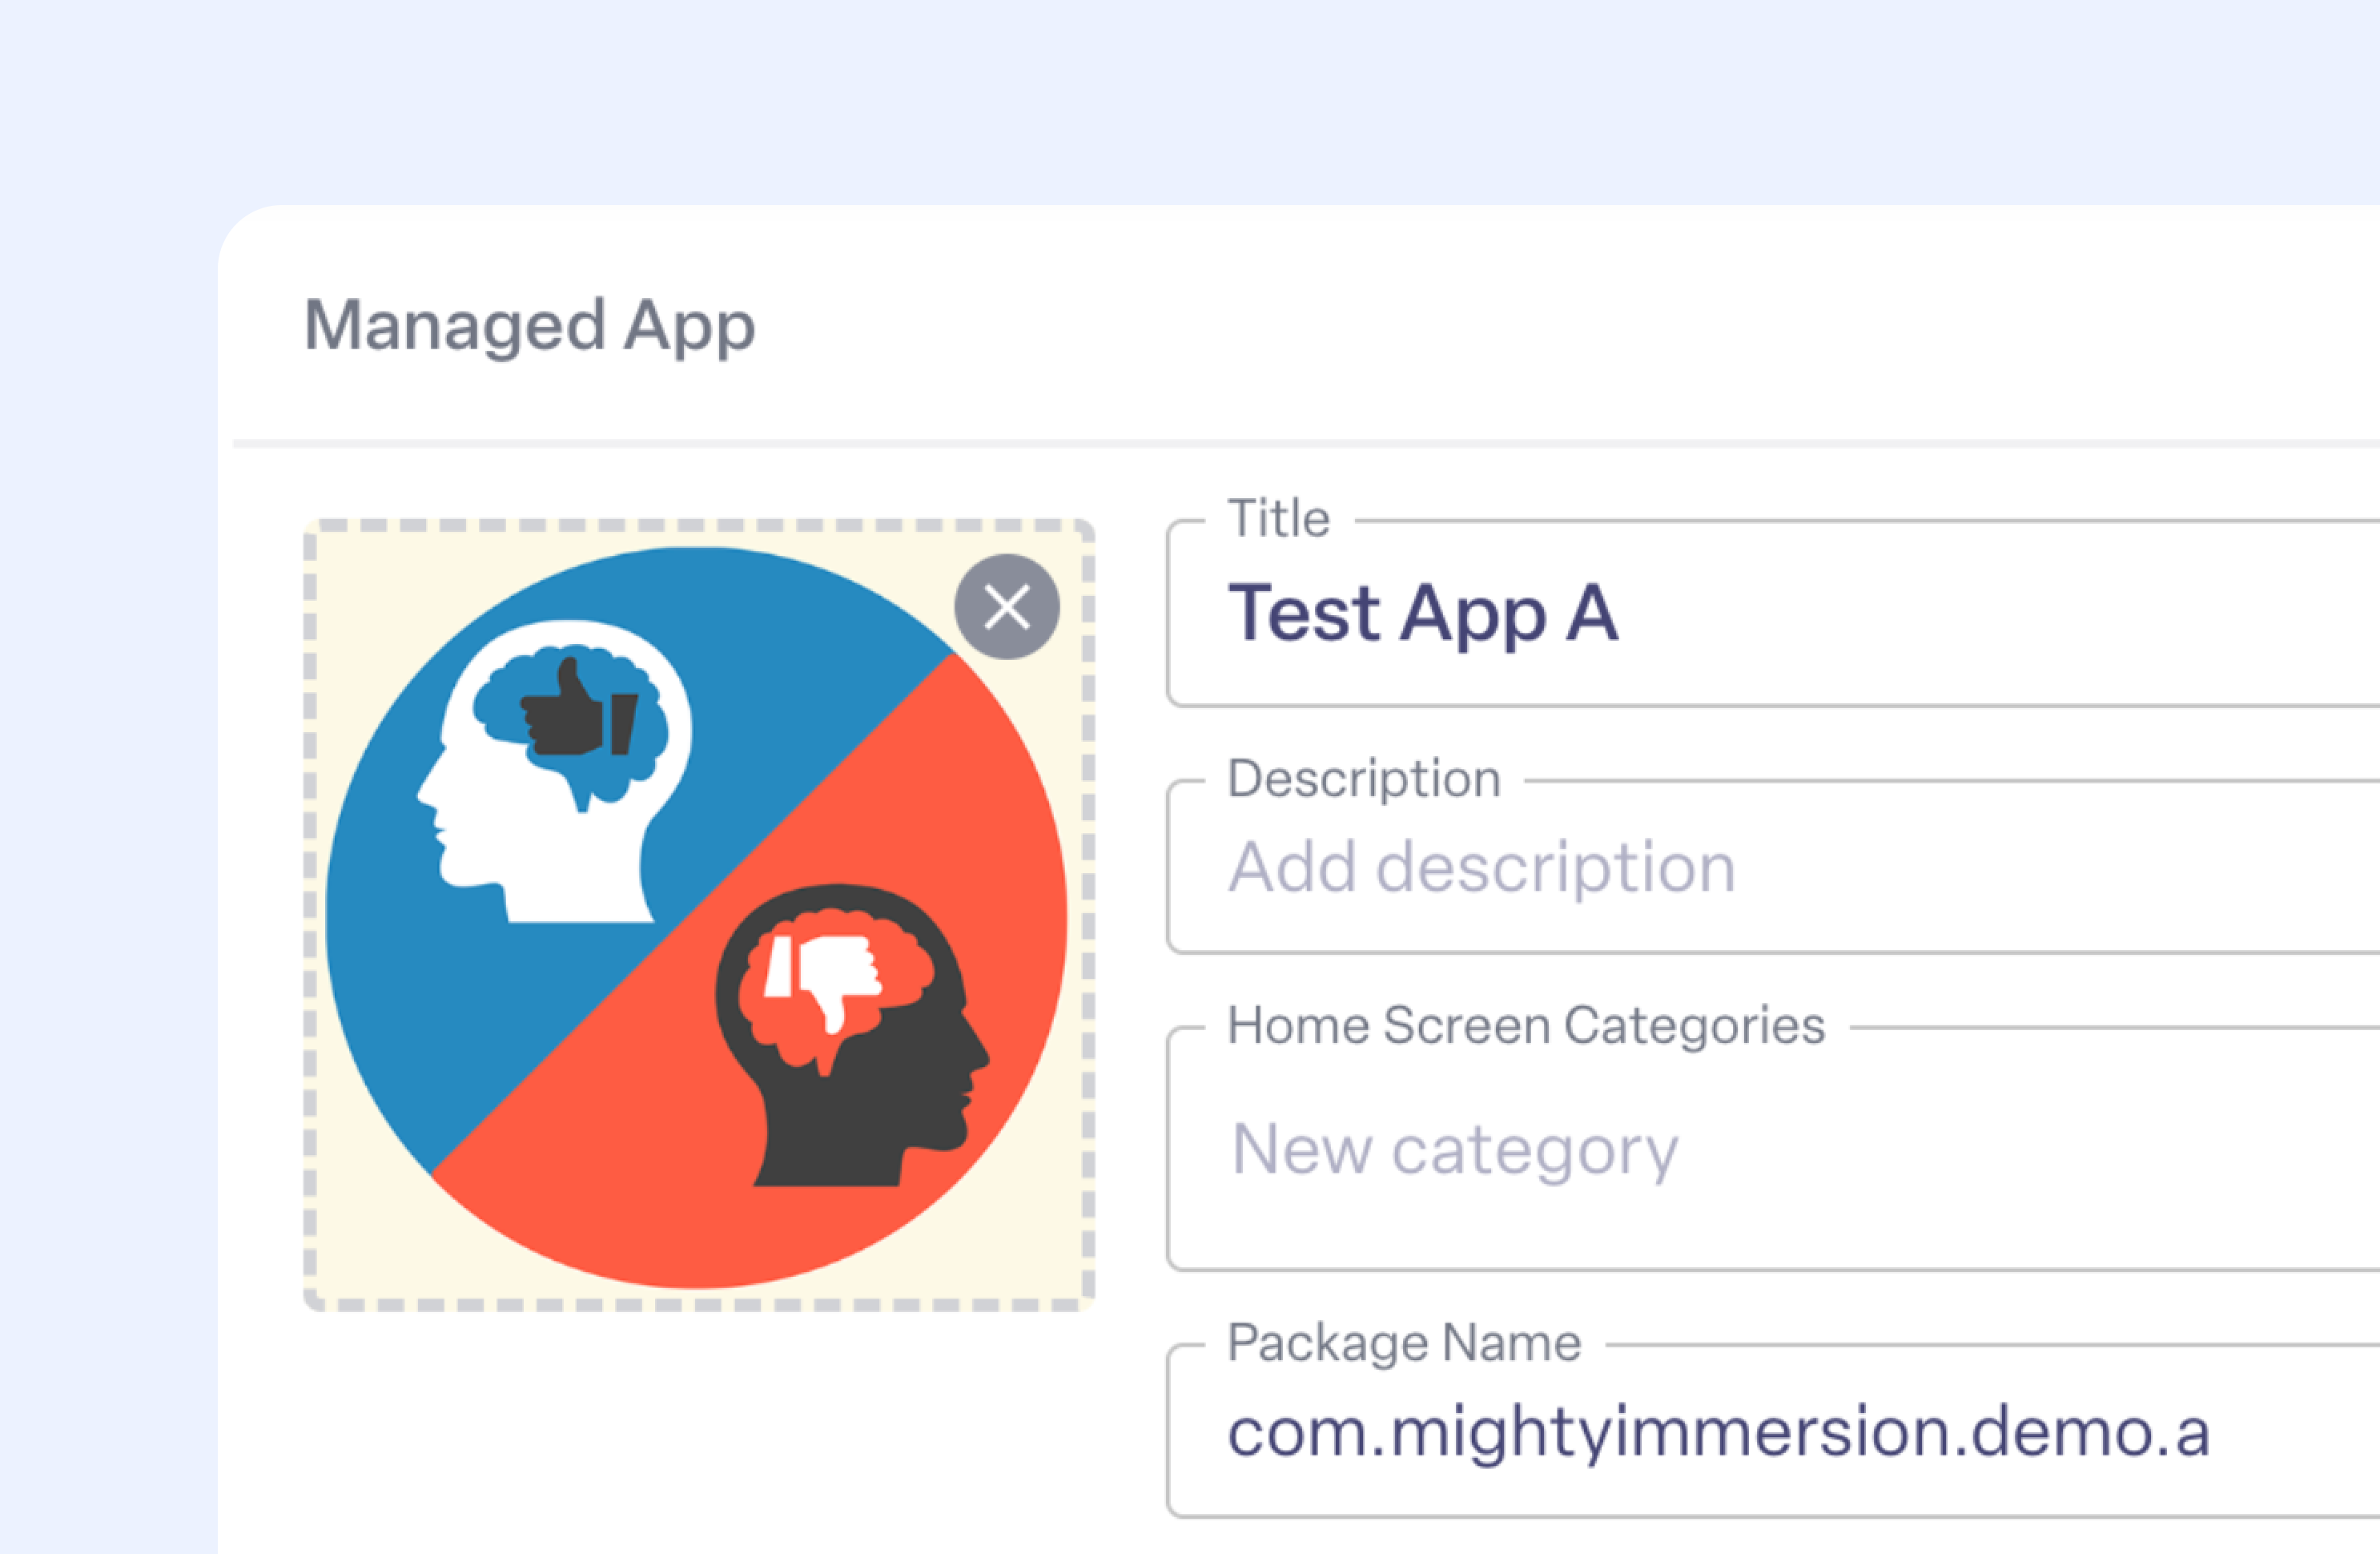
Bonus! Here’s a quick tip to customize your app icons. We can change the app icon to a custom image. Select a custom image of your choice from this icon library. Then, select the app icon and replace it with the image you selected. Hit “Save Changes” when ready. When you display this app on your devices, it will present the new app icon instead of the default Android icon.
Upload Wi-Fi Networks
A key component of a configuration is your Wi-Fi network. In order to remotely manage, update, and configure devices, devices need to communicate with the internet. You can alternatively push updates over the wire, if you are in an environment without Wi-Fi, but most customers prefer remote updates for ease of use.
You can provide a list of Wi-Fi networks for your devices to remember. This is especially useful in situations where devices are provisioned in one location, but eventually shipped to another where they will be used. For example, IT teams may unbox and provision devices in one location, but send devices across multiple sites where workers will use them.
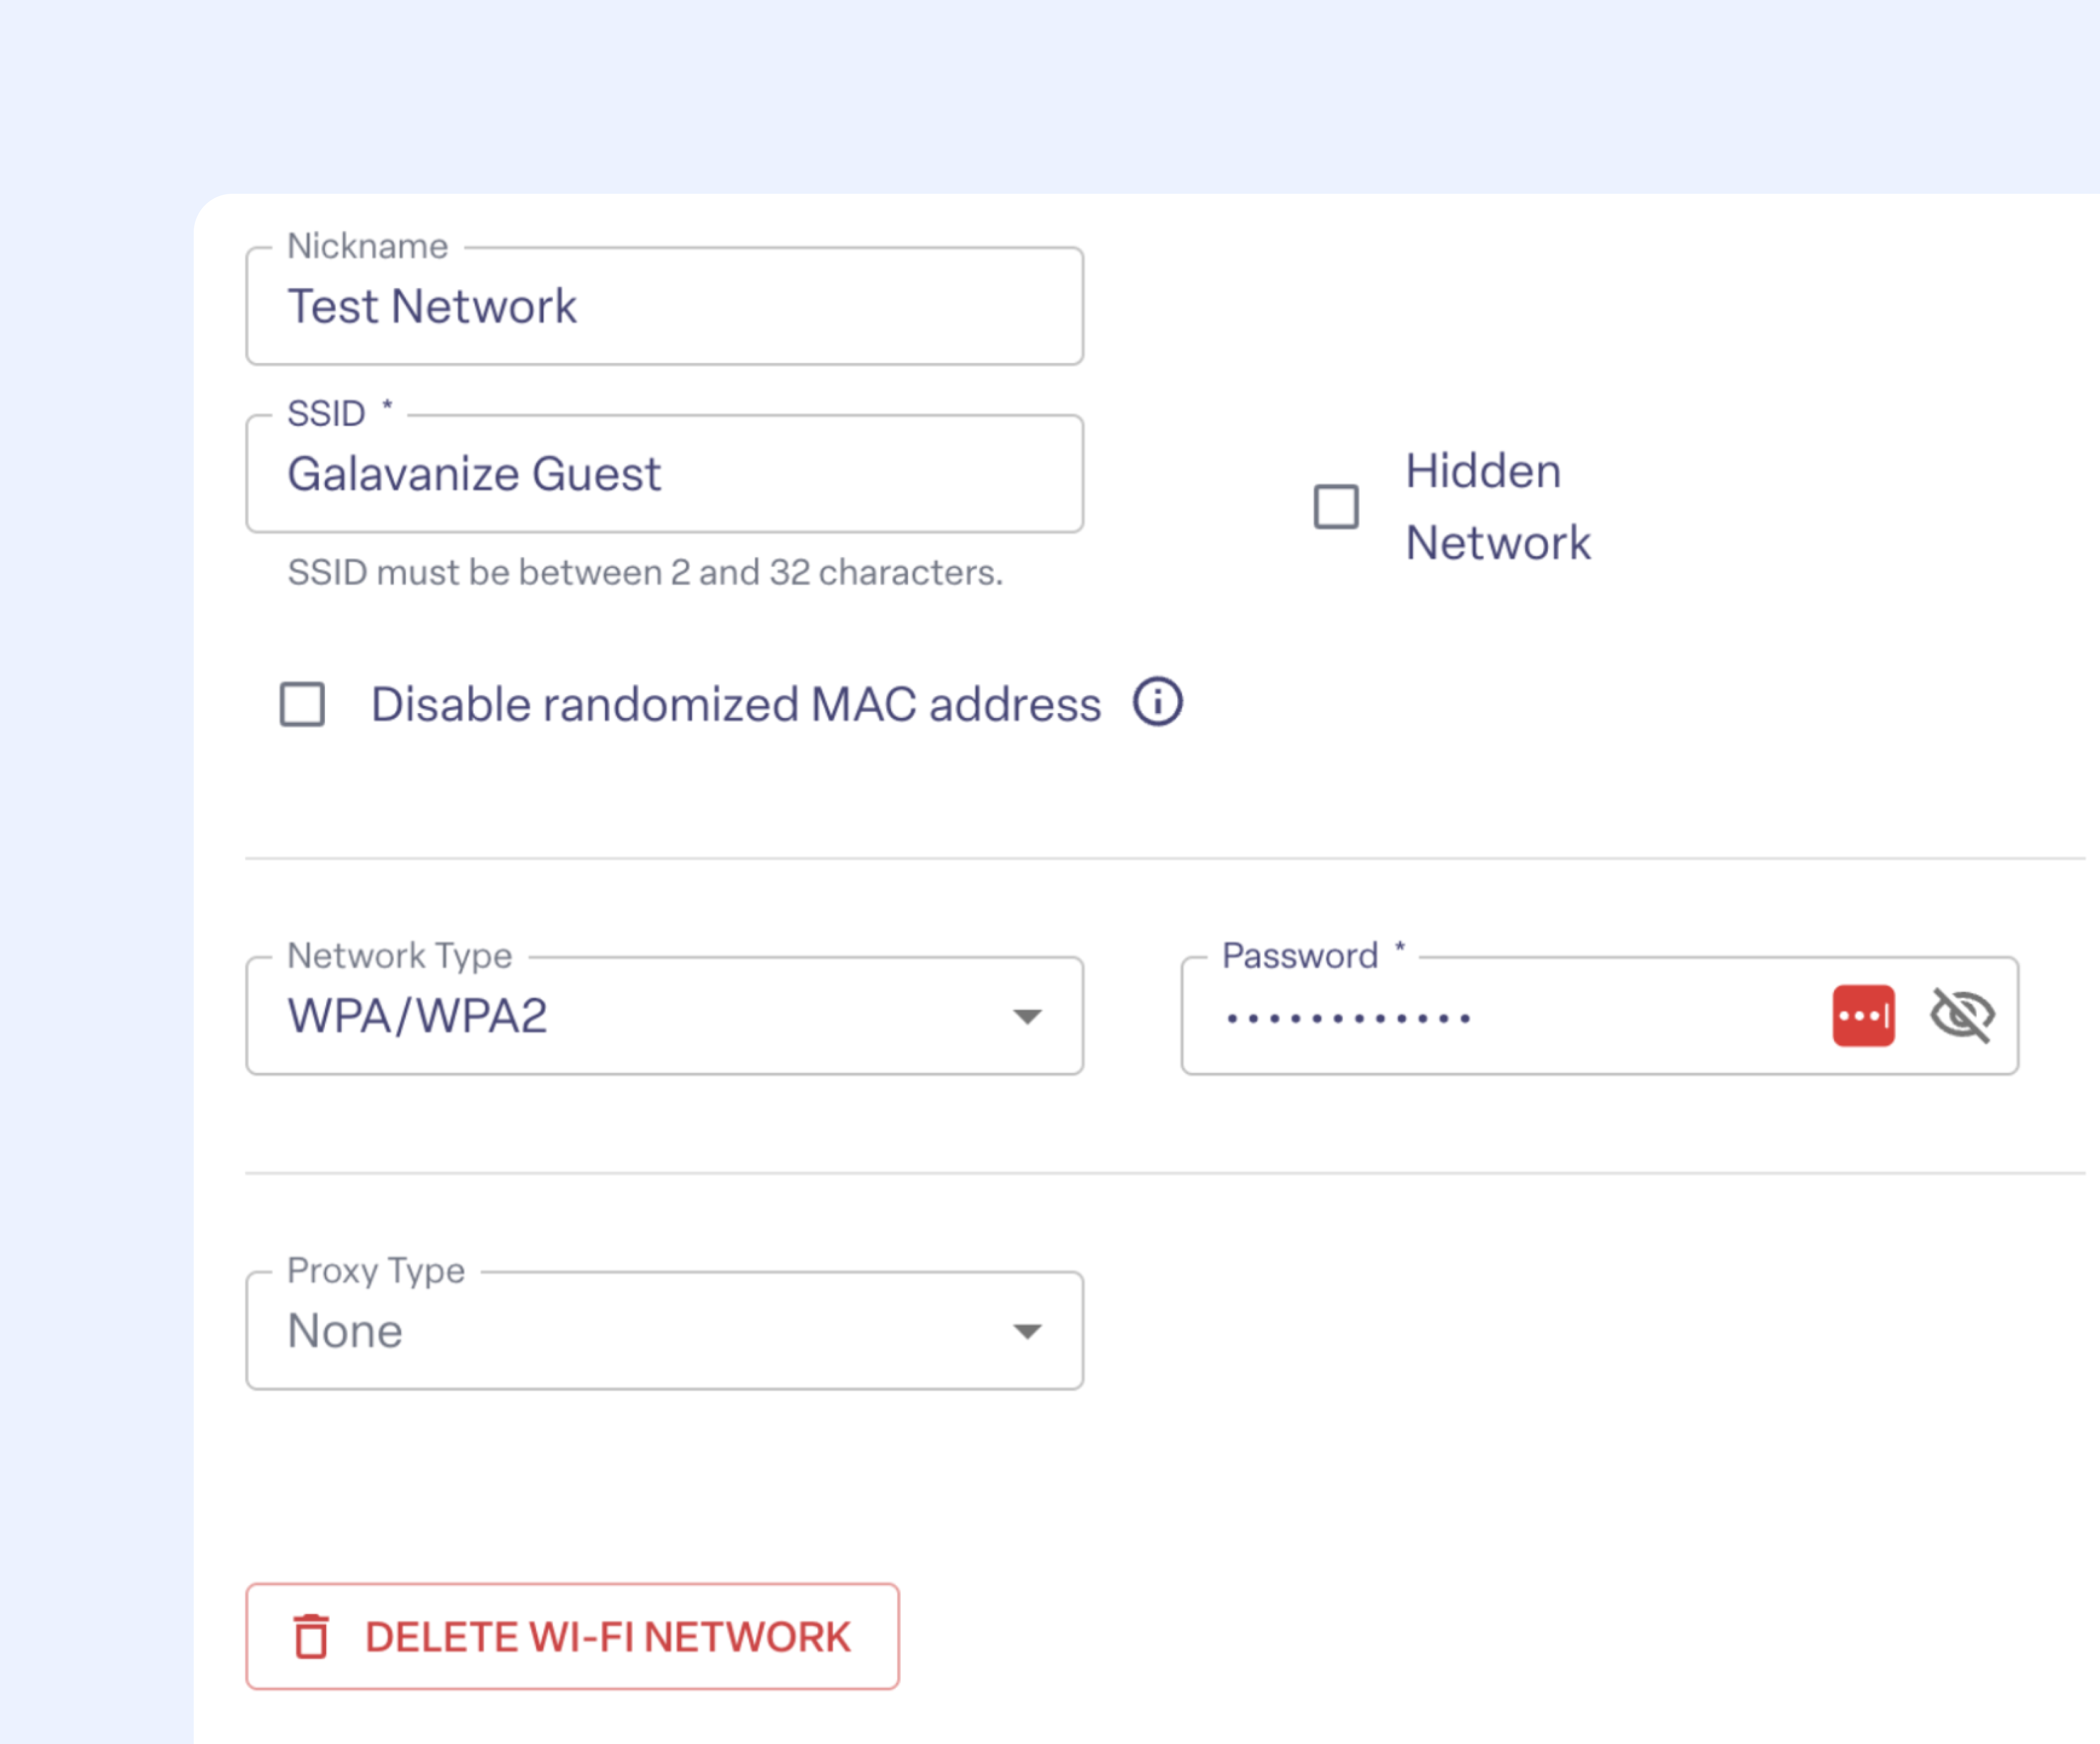
On the left bar under “Library”, click “Wi-Fi Networks”, which will take you to a page where you can upload your Wi-Fi credentials.
Click the “+” to add a new Wi-Fi network. Select the correct Network Type and fill in the appropriate fields for your network. For example, a WPA/WPA2 network type only need the SSID and password. Once finished, save your changes. Now, your Wi-Fi network is saved in your Wi-Fi Library.
Build a Configuration
Now that our basic building blocks are in order (VR content and Wi-Fi networks), let’s walk through the steps of building a sample configuration.
Device management on ManageXR happens through configurations. You apply a configuration to a device or group of devices to control the content, settings, and user experience of the devices. You can update configurations at any time; upon updating a configuration, the changes will automatically apply to the devices. Offline devices will receive the latest configuration updates when they come online again.
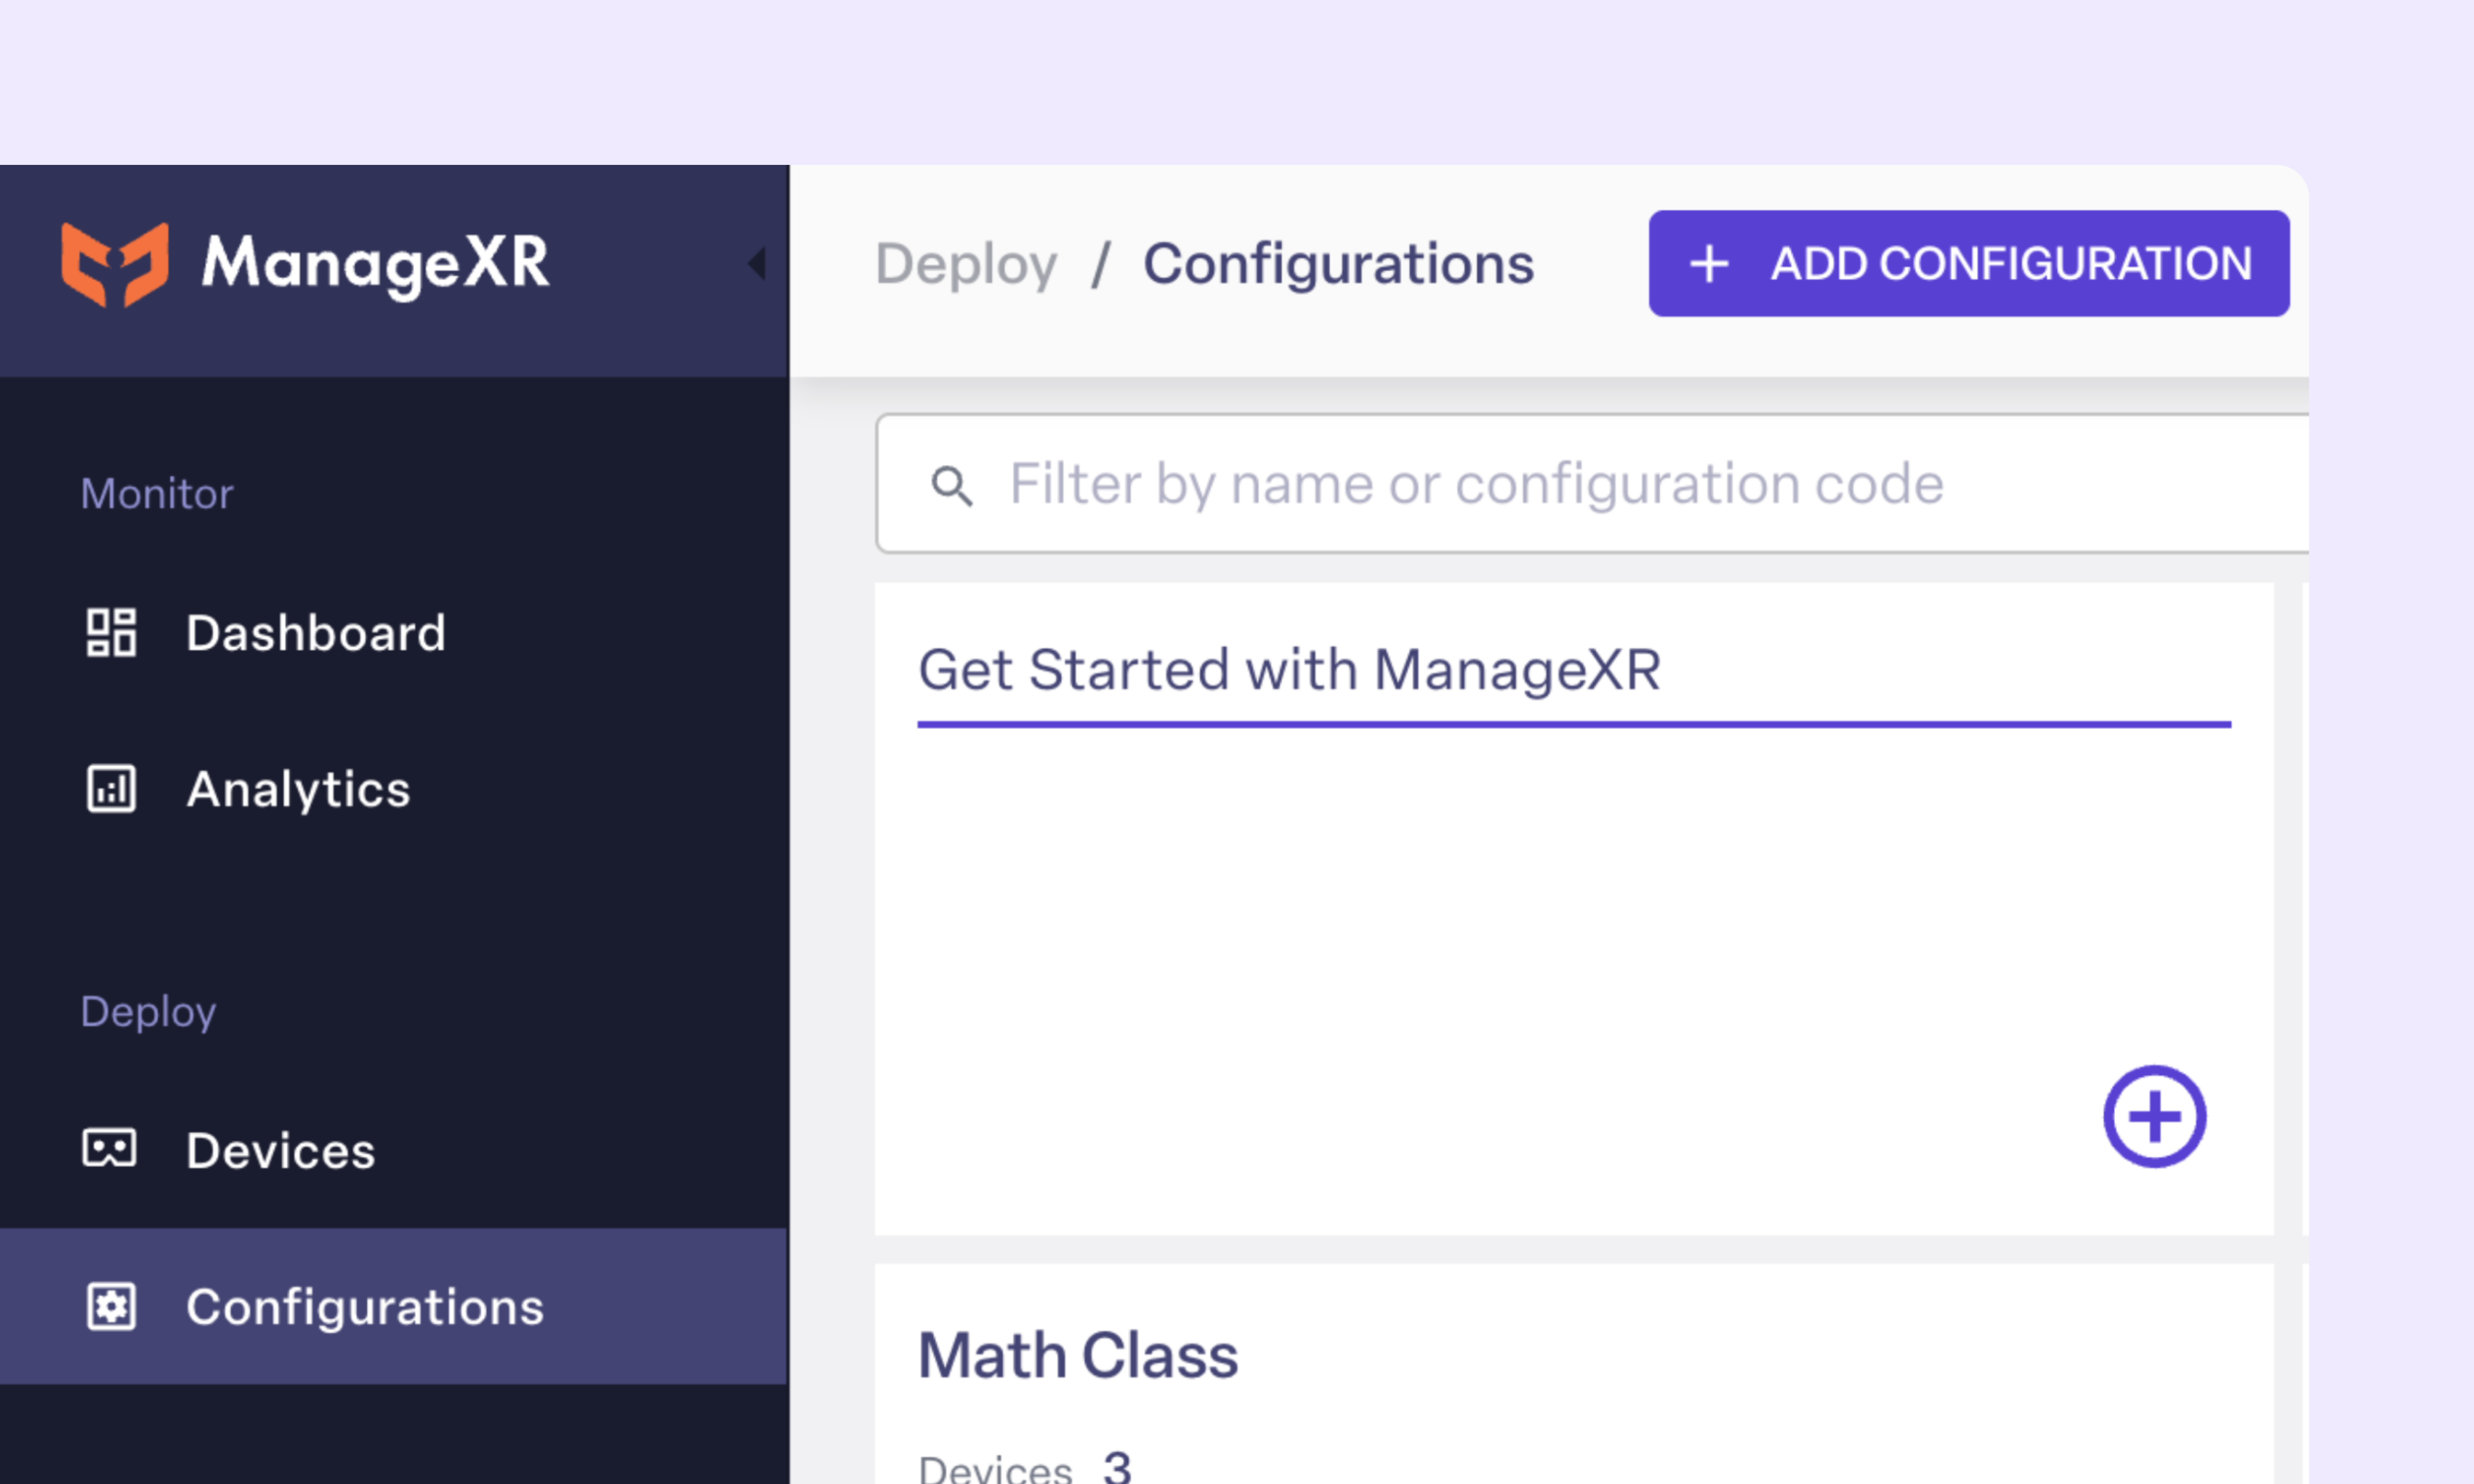
To make a new configuration, simply navigate to “Configurations” on the left, and add a new configuration. We’ll name our configuration “Get Started with ManageXR”, then press the “plus” button to create it.
Next, click into the configuration. Navigate to the “Apps” section. You’ll notice that Test App A is now listed in your App Library, but is not yet deployed to your configuration. To deploy it, hover over Test App A and click “Deploy” and “Save Changes”.
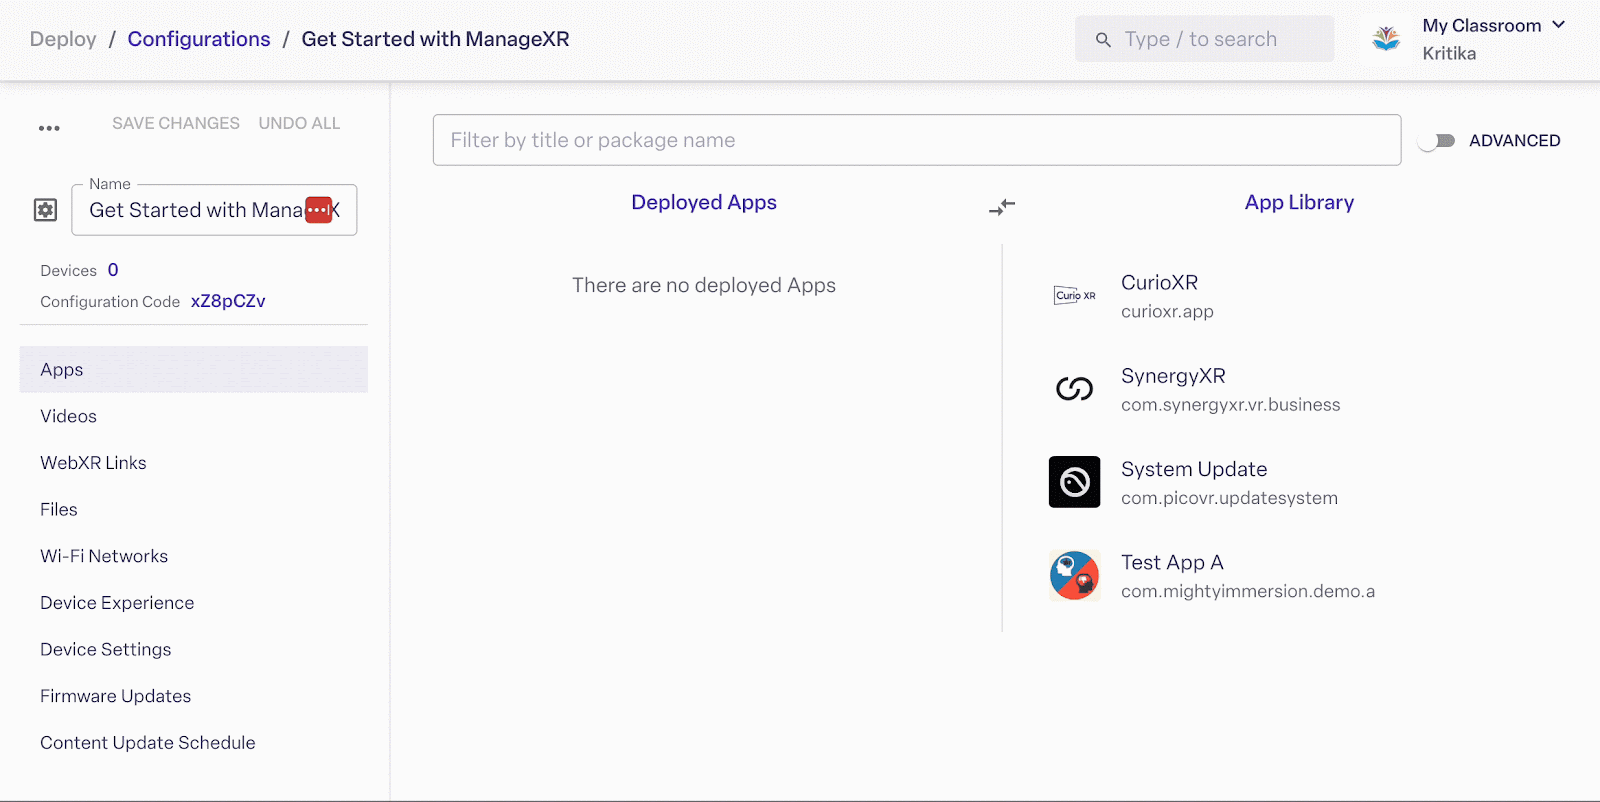
Now, your configuration is provisioned with Test App A!
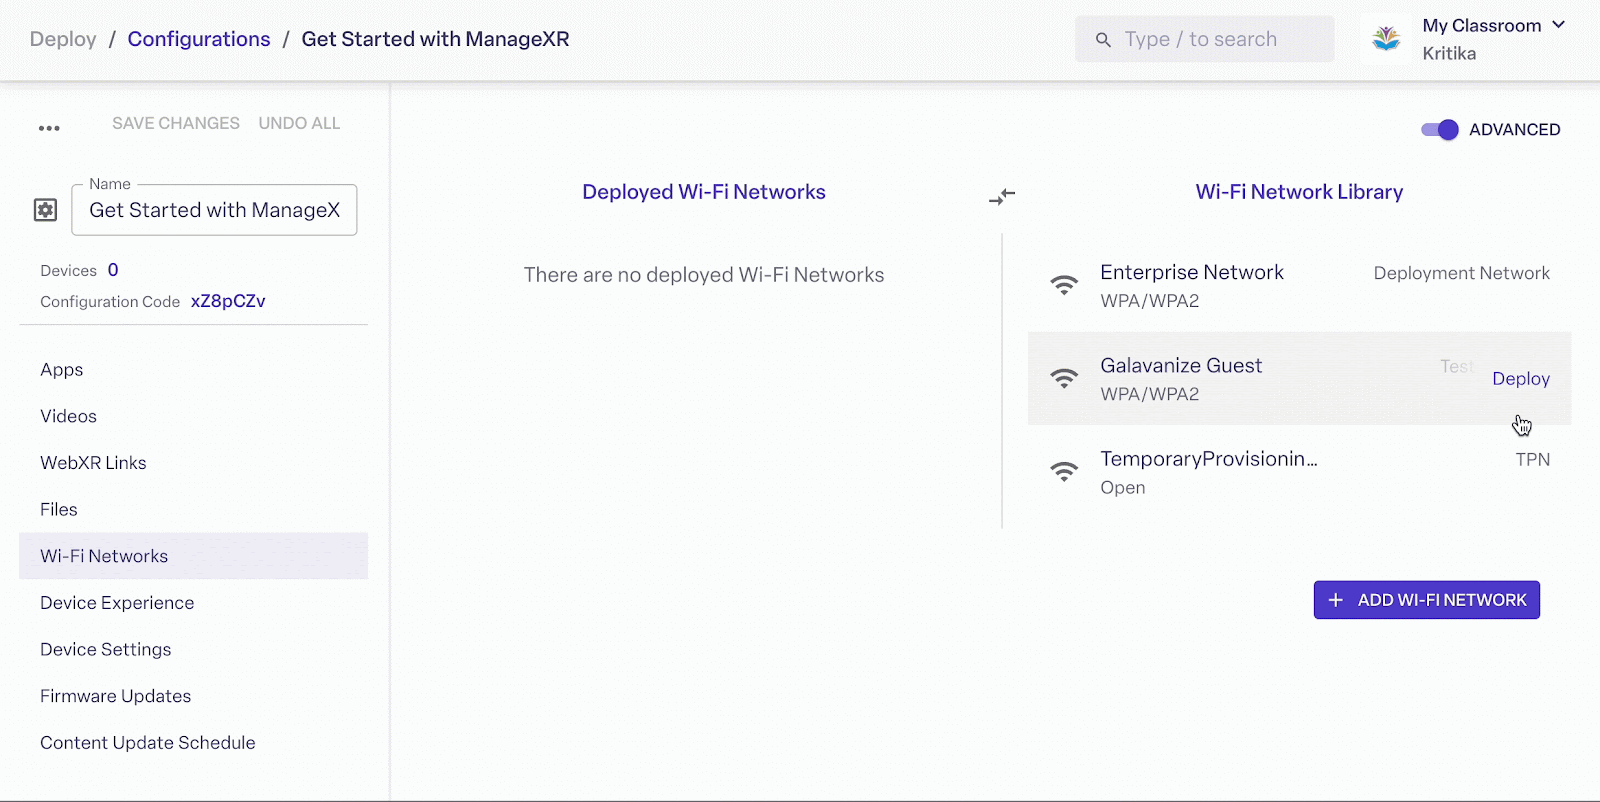
Deploying a Wi-Fi network to your configuration follows a similar process. Navigate to “Wi-Fi Networks” in the configuration. You’ll find the Wi-Fi network we created under the Wi-Fi Network Library. Then, hover over the Wi-Fi network and click “deploy”. Now, devices on this configuration will connect to this network if it is available.
Bonus! Ensure devices always connect to a specific Wi-Fi network by flagging the “Always connect if available” setting.
When this option is turned on, the device will always connect to the selected network whenever it’s in range. Even if a user manually connects to another network or hotspot in-headset, the device will automatically disconnect and rejoin the designated network as soon as it’s available.
This ensures devices stay connected to your secure, reliable Wi-Fi and aren’t left on a less trusted or temporary connection.
Customize the Device Experience
You can customize the device experience based on your deployment’s needs. The two device experiences you can choose from are “Restricted Kiosk” or “Default Device Menus”.
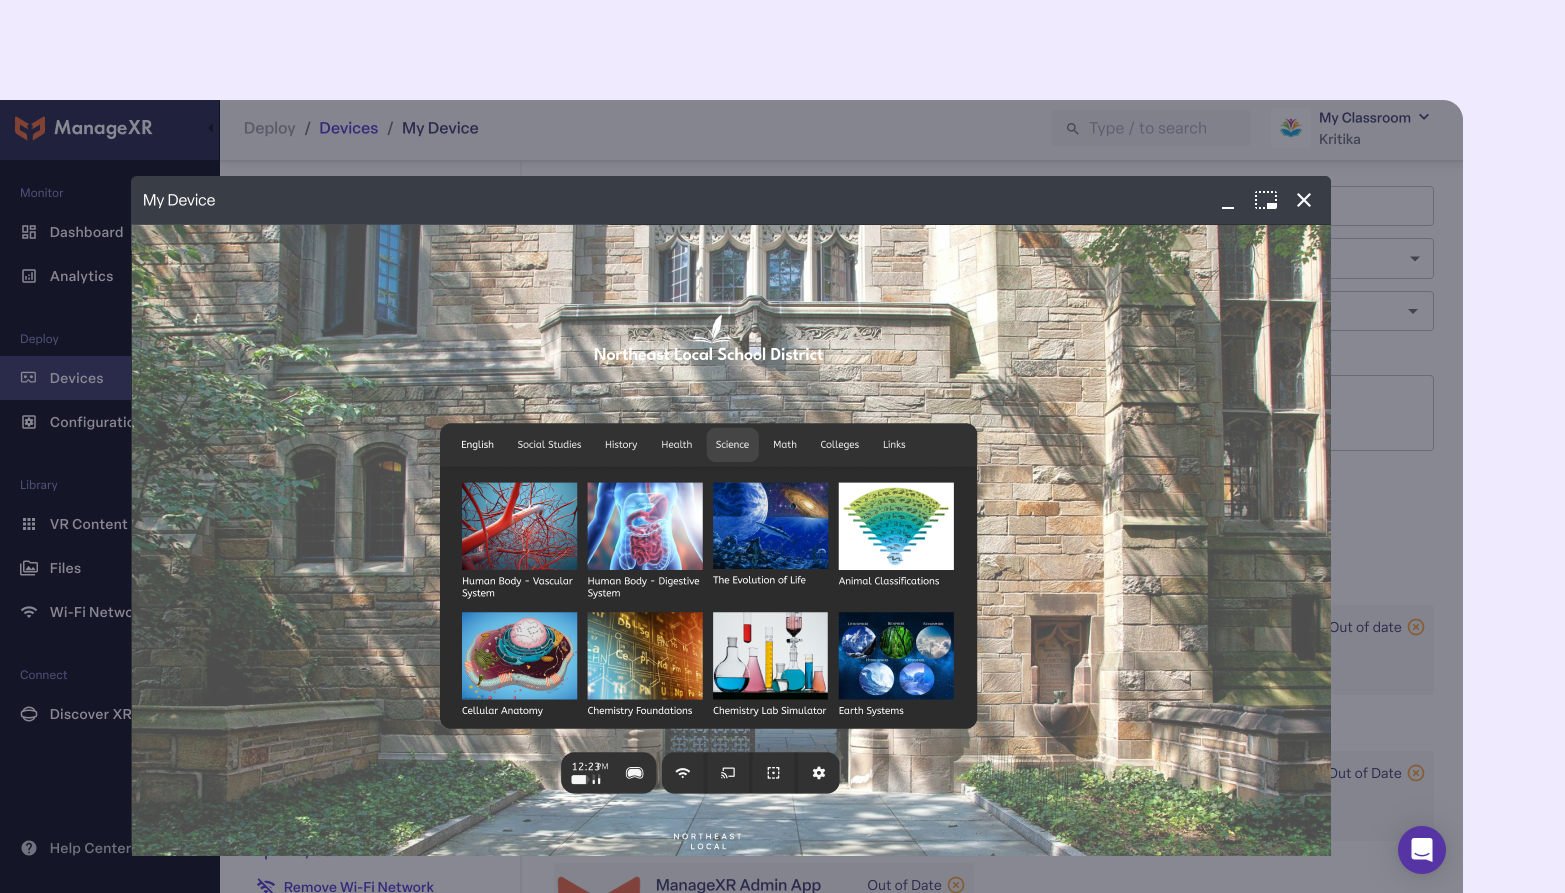
“Restricted Kiosk” mode removes access to the native menus that come with your devices out of the box. For example, you can lock devices down to a single app or video, which we call “Kiosk App” and “Kiosk Video”. Or, you can select “Custom Home” mode and display your preferred apps and settings on a custom home screen.
The “Default Device Menus” mode maintains access to the native menus that come with your device. Your devices can still access content you upload to your configuration; however, they can also access default apps, such as internet browsers, messaging apps, app stores, and social media.
If you enroll Meta devices with ManageXR through Meta Horizon managed services, you must decide if your devices will be in Shared Mode or Individual Mode. Shared Mode is designed for deployments where devices are used by multiple people. Individual Mode is intended for a Meta Quest device that’s used by one person in your organization (1:1). Learn more about Meta device modes here.
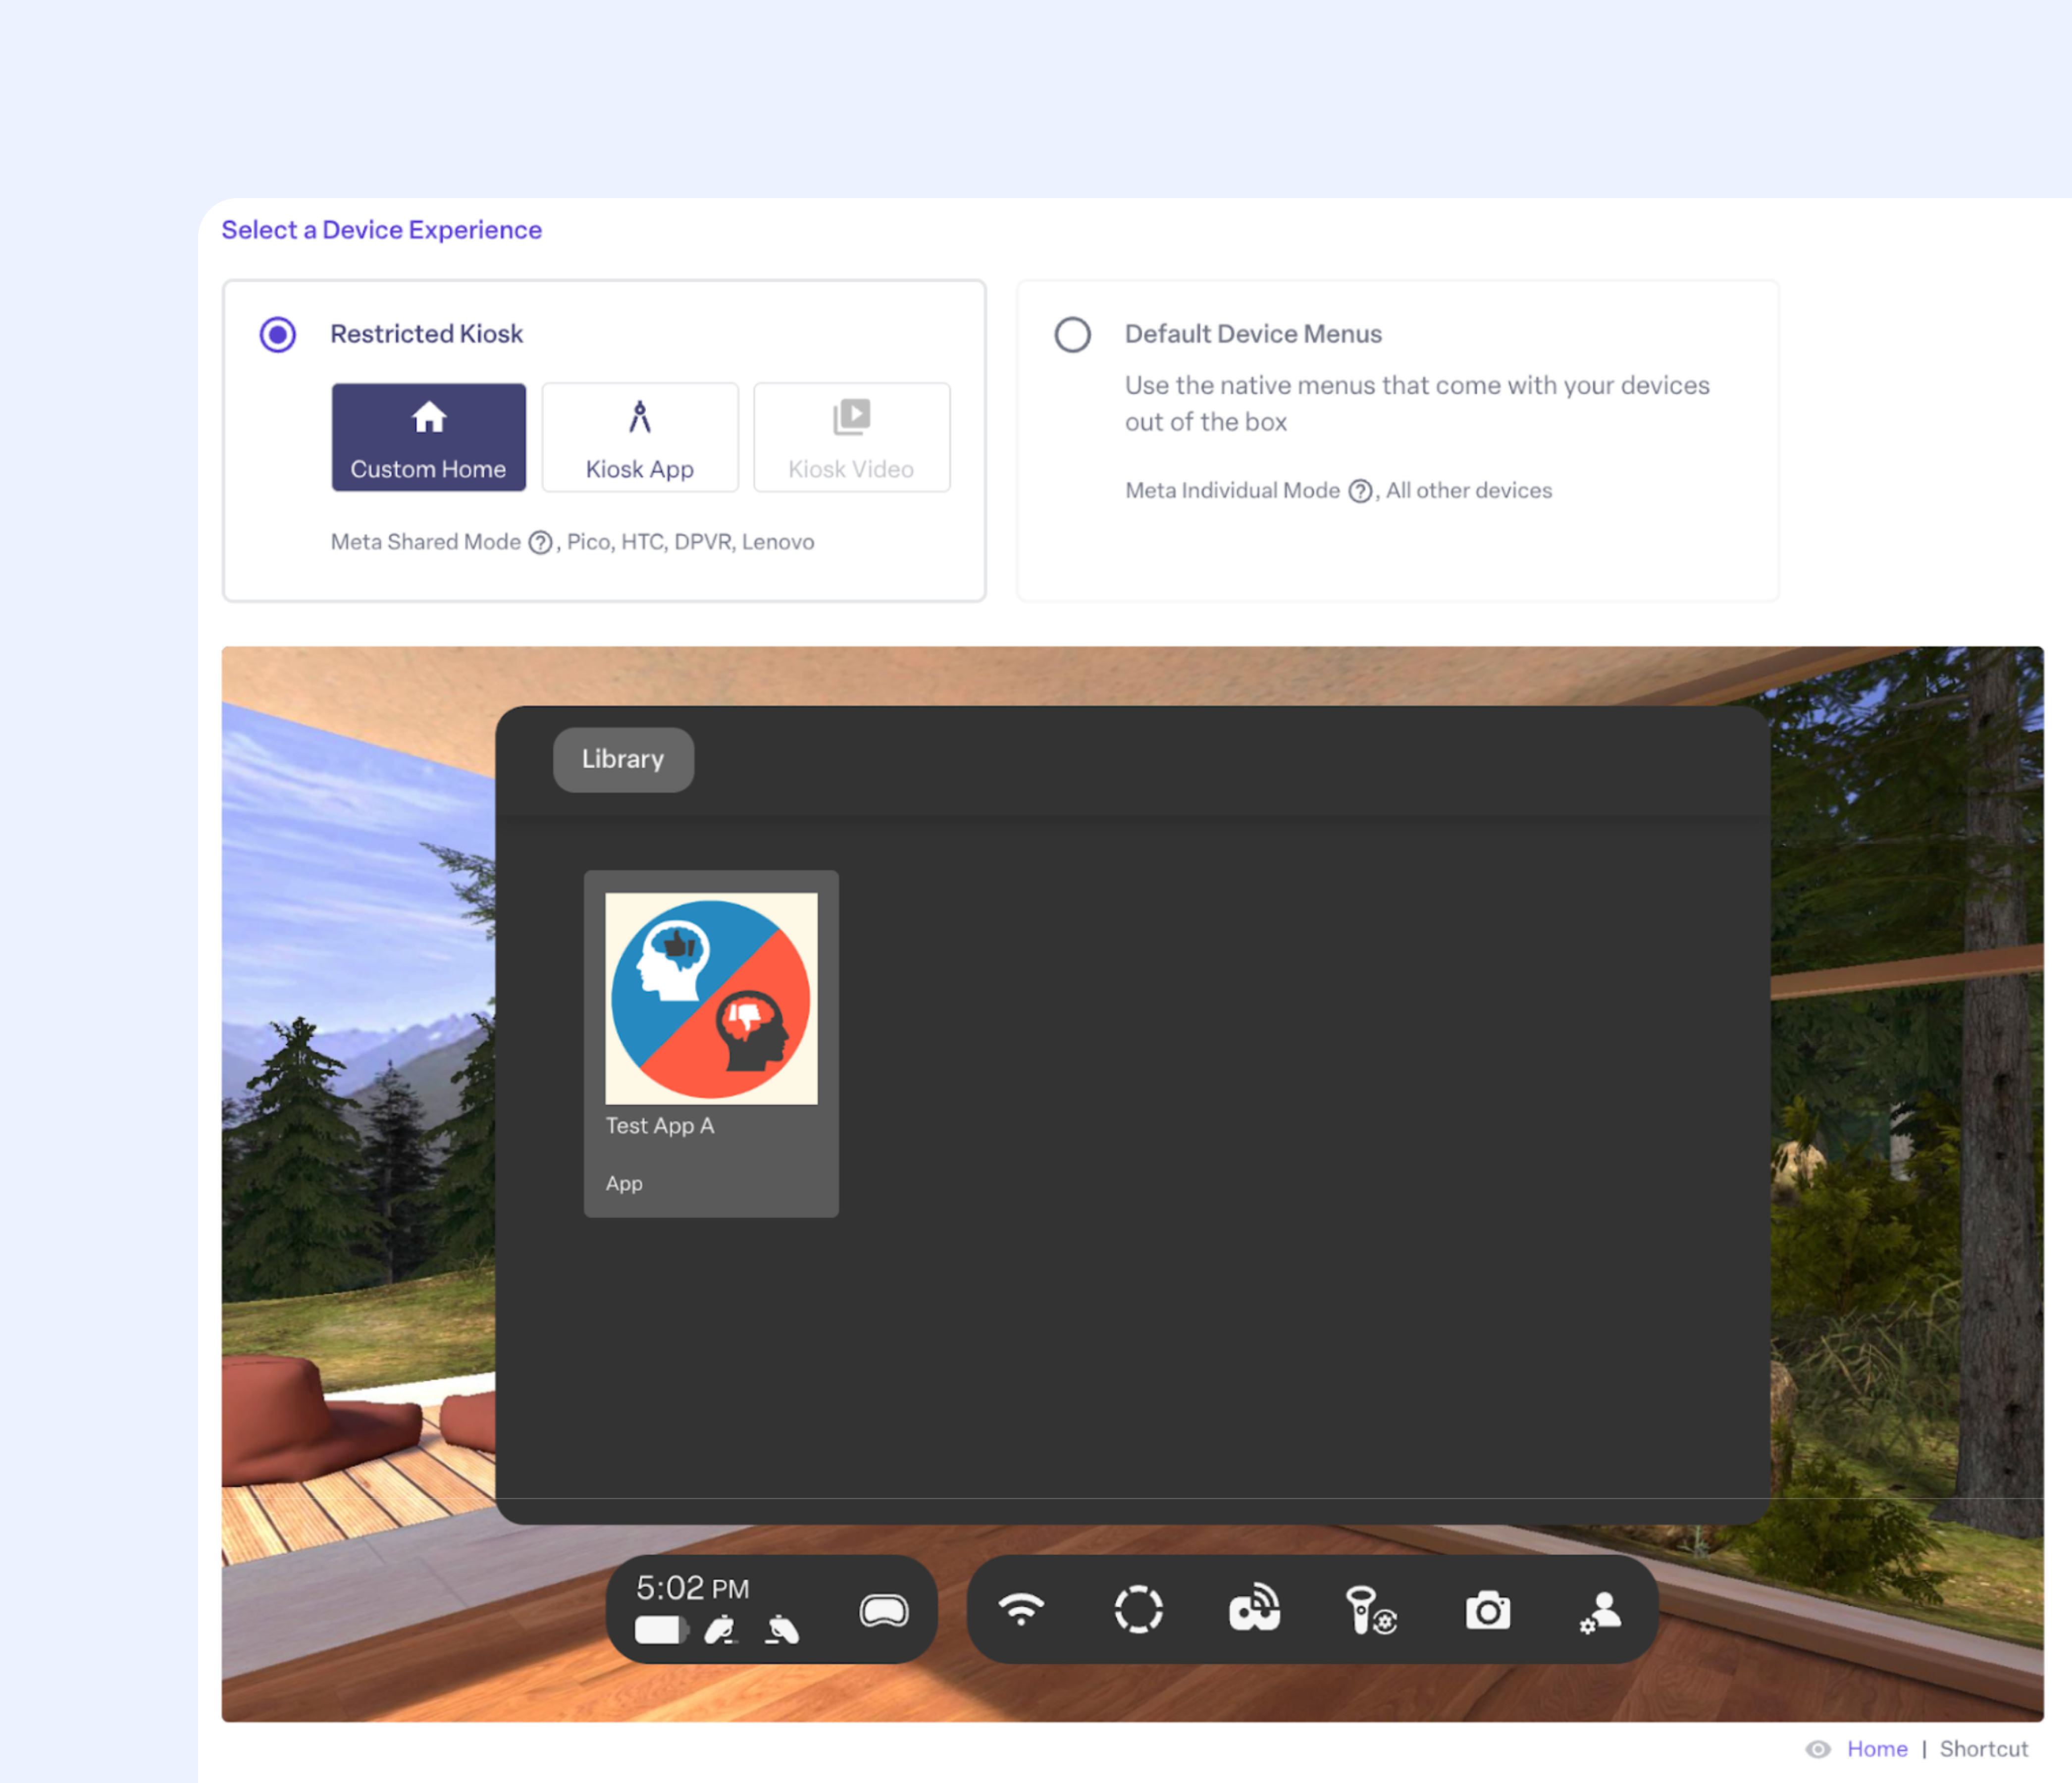
Most customers prefer a locked-down, focused VR experience with a customizable home screen, leading them to choose the “Restricted Kiosk” mode. For this guide, we will select “Restricted Kiosk” and “Custom Home”.
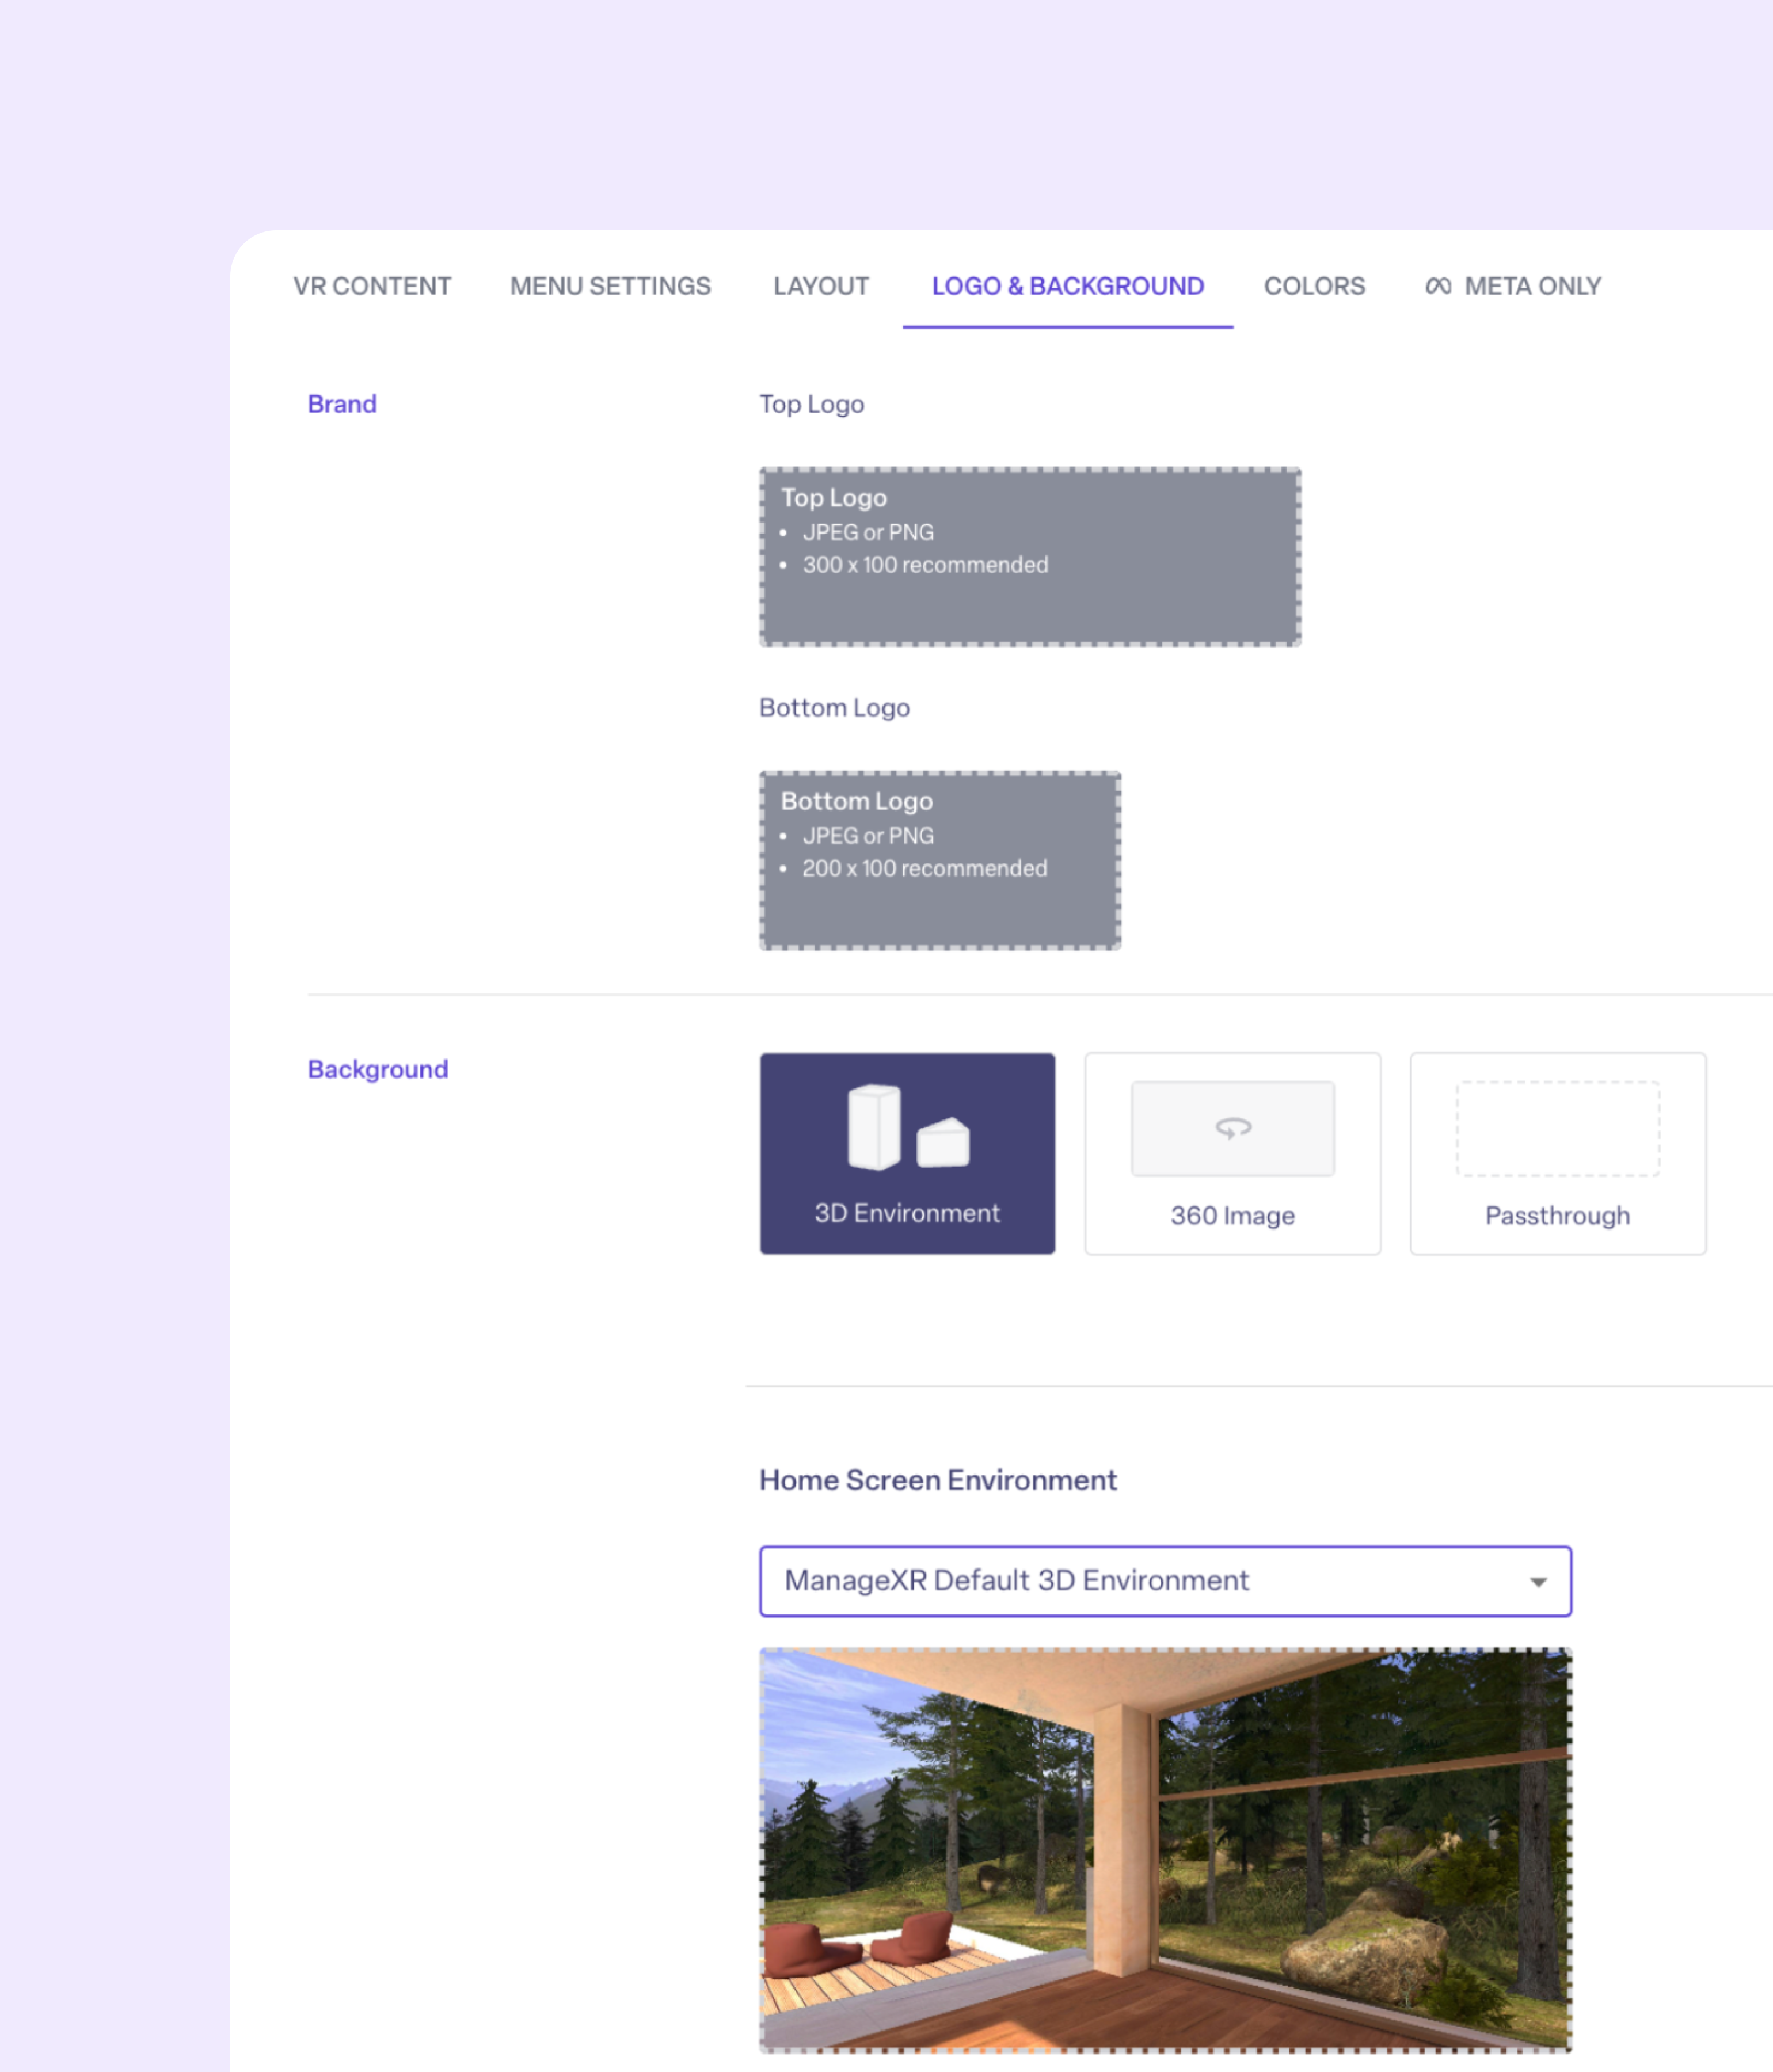
Under “Logo & Background”, you can customize the Home Screen environment to meet your brand guidelines. Add your logo and choose a background environment. By default, your configuration is set to the ManageXR Default 3D environment.
Assign a Configuration to Your Device
Now that you’ve built and customized your configuration, it’s time to deploy it to your device.
Go to the Devices tab and select the device you want to manage. You’ll see a “Configuration” dropdown where you can choose from any of the configurations you’ve created.
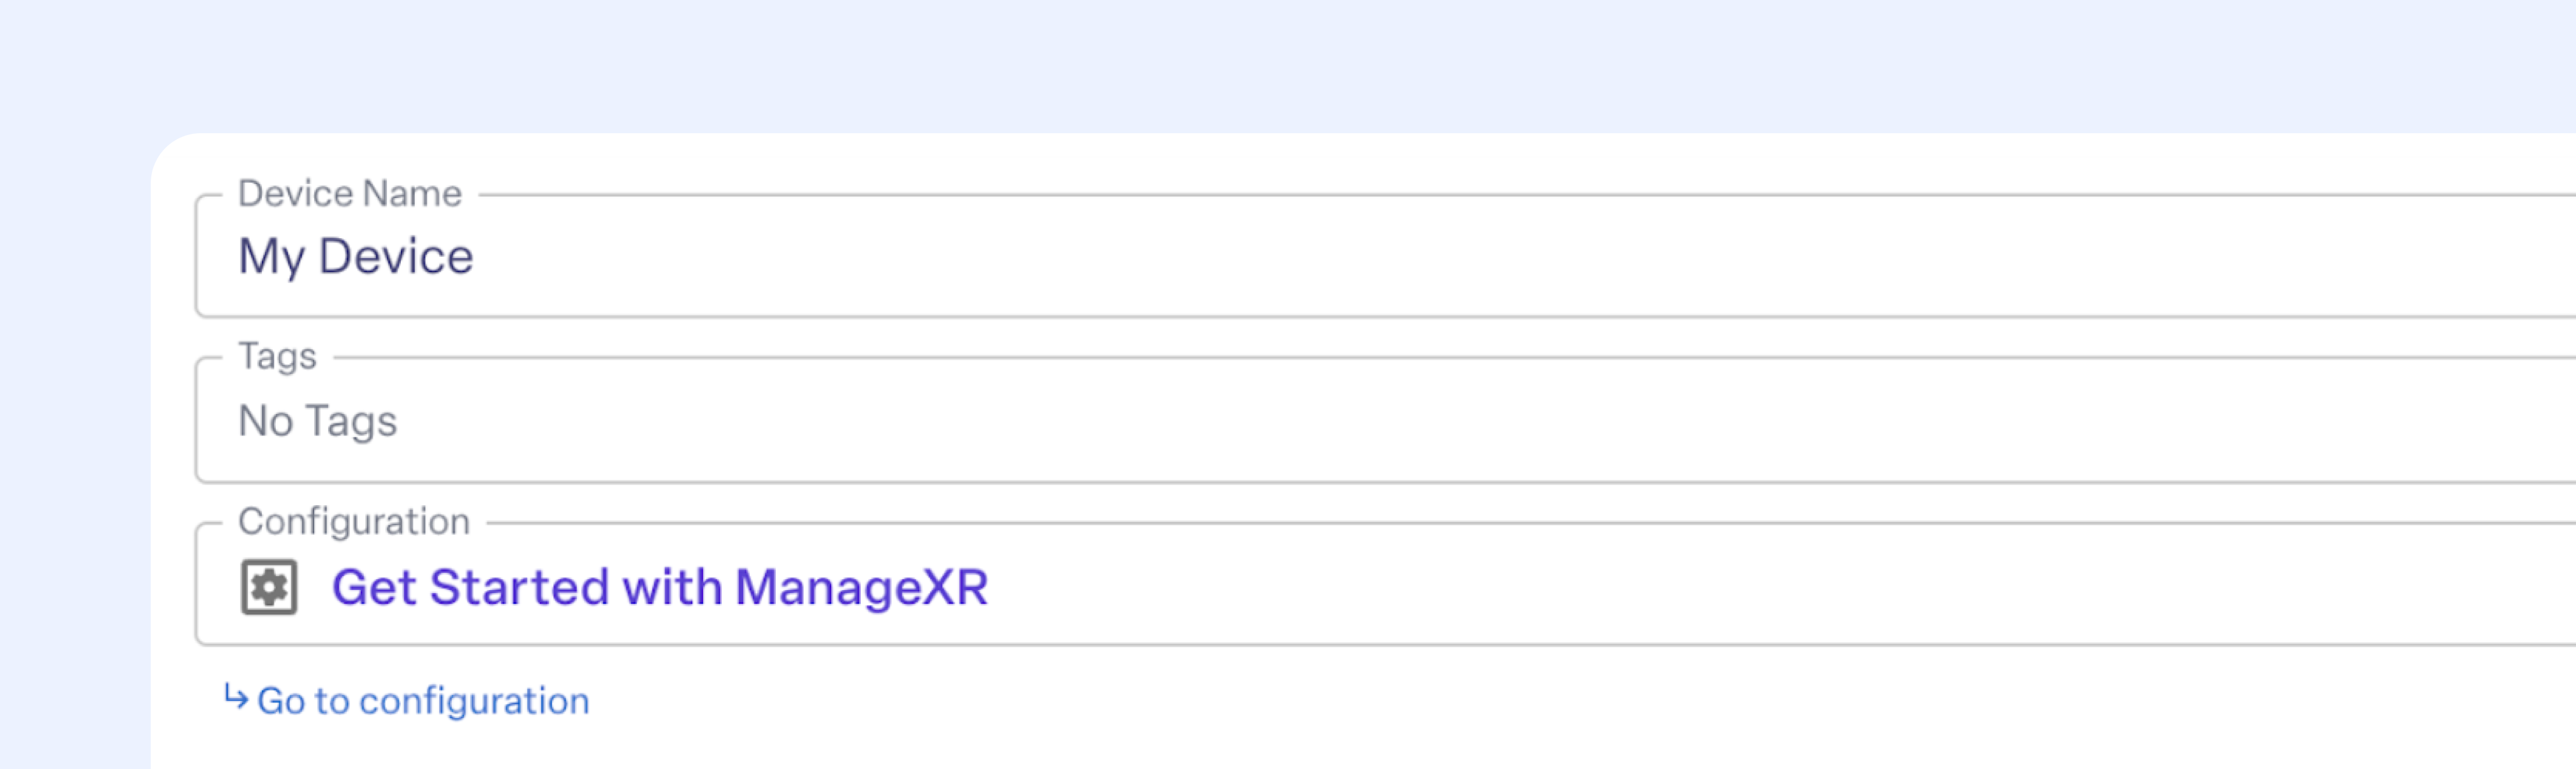
Select “Get Started with ManageXR” and hit Save Changes. Your device will receive the configuration as soon as it’s online. You’ll notice that the new app you added, the Wi-Fi credentials, and the customized home screen will now appear on your device.
Note: If your device is offline, the configuration will automatically apply the next time the device connects to the internet.
Congratulations! Your device is now fully configured with your custom configuration, and can now be managed remotely through ManageXR.
Remotely Command Your Device
Beyond configurations, ManageXR lets you control your devices in real-time. You can send commands to your devices from anywhere in the world, as long as the device is online and connected to Wi-Fi.
To try it out, navigate to your device by going to the Devices tab and clicking on your device. Then, find the list of remote commands on the left tab. From here, you can launch a remote command from the list.
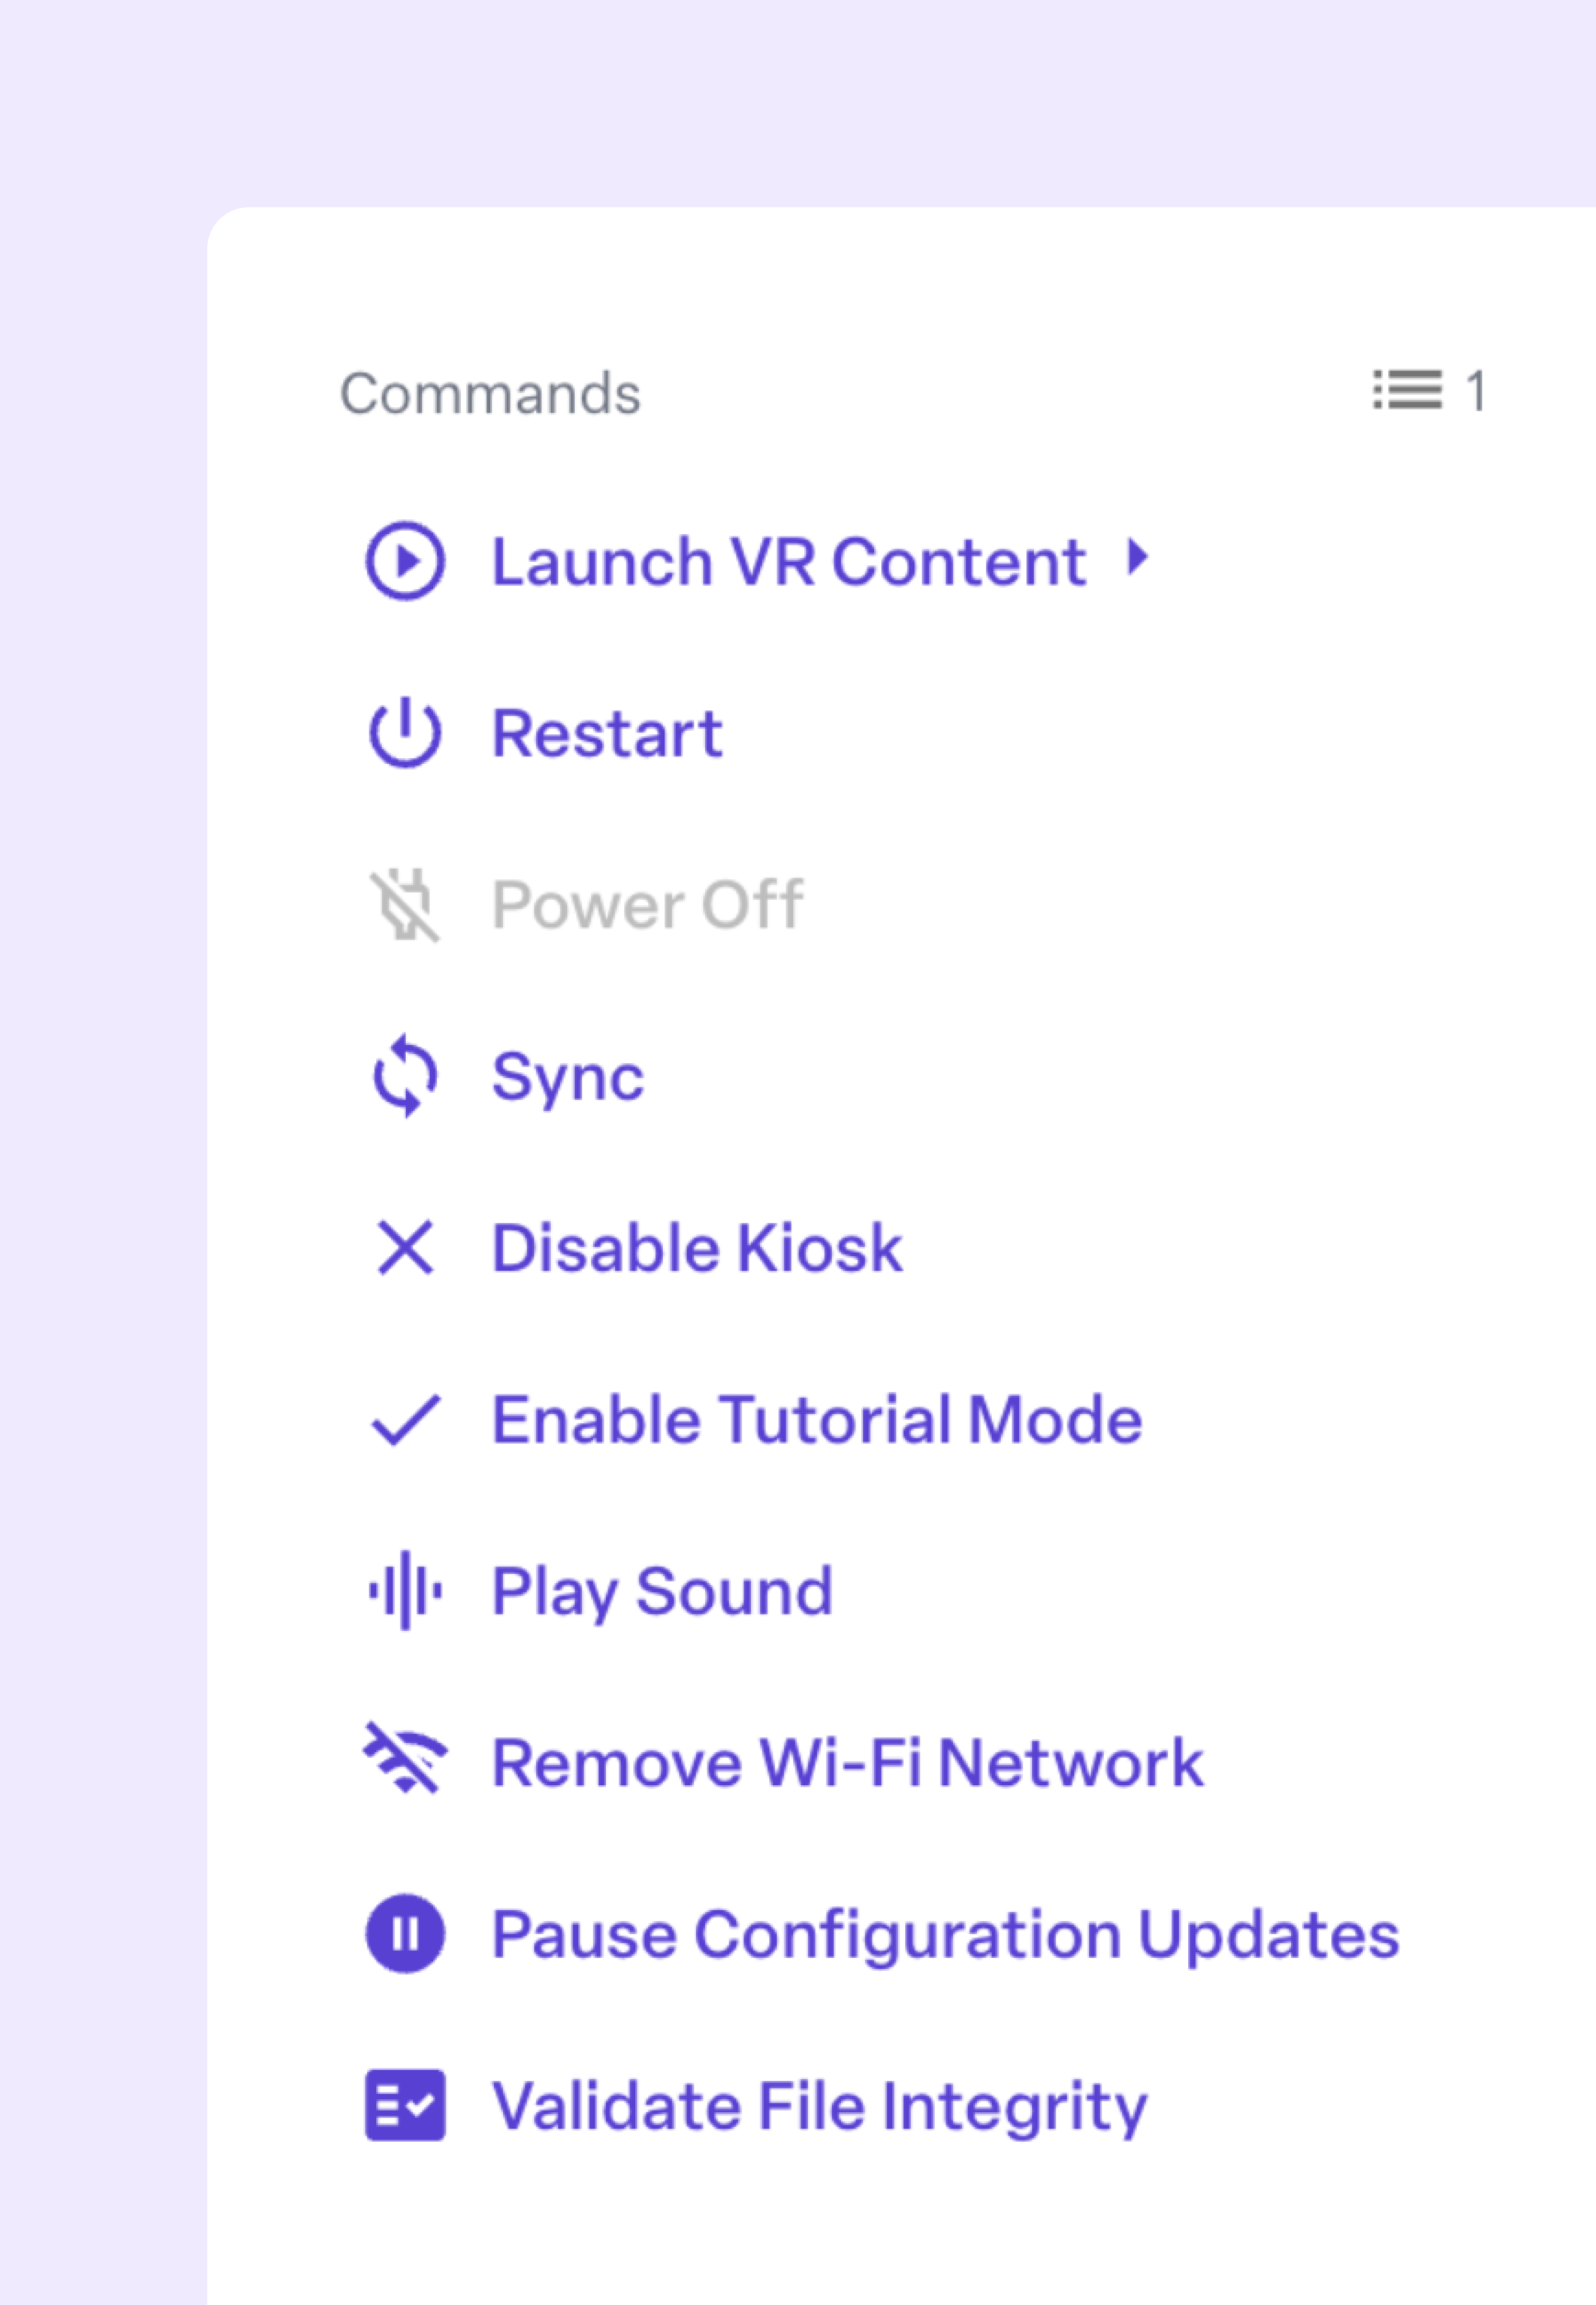
On your device, try these remote commands:
Play a sound from your device: If your device is ever lost in your office or classroom, you can play a sound to help locate it. Think “Find my iPhone” for VR.
Launch VR content: Remotely launch an app on your device. Try launching App A! Then, put on your headset to see that App A is open on your device.

Sync: If you made changes to your configuration, you can use the sync command to update your device to the latest configuration instantly. Test this feature by saving a change to the configuration on your device, and then launching the sync command to push the update to your device immediately.
Remote Screen Streaming
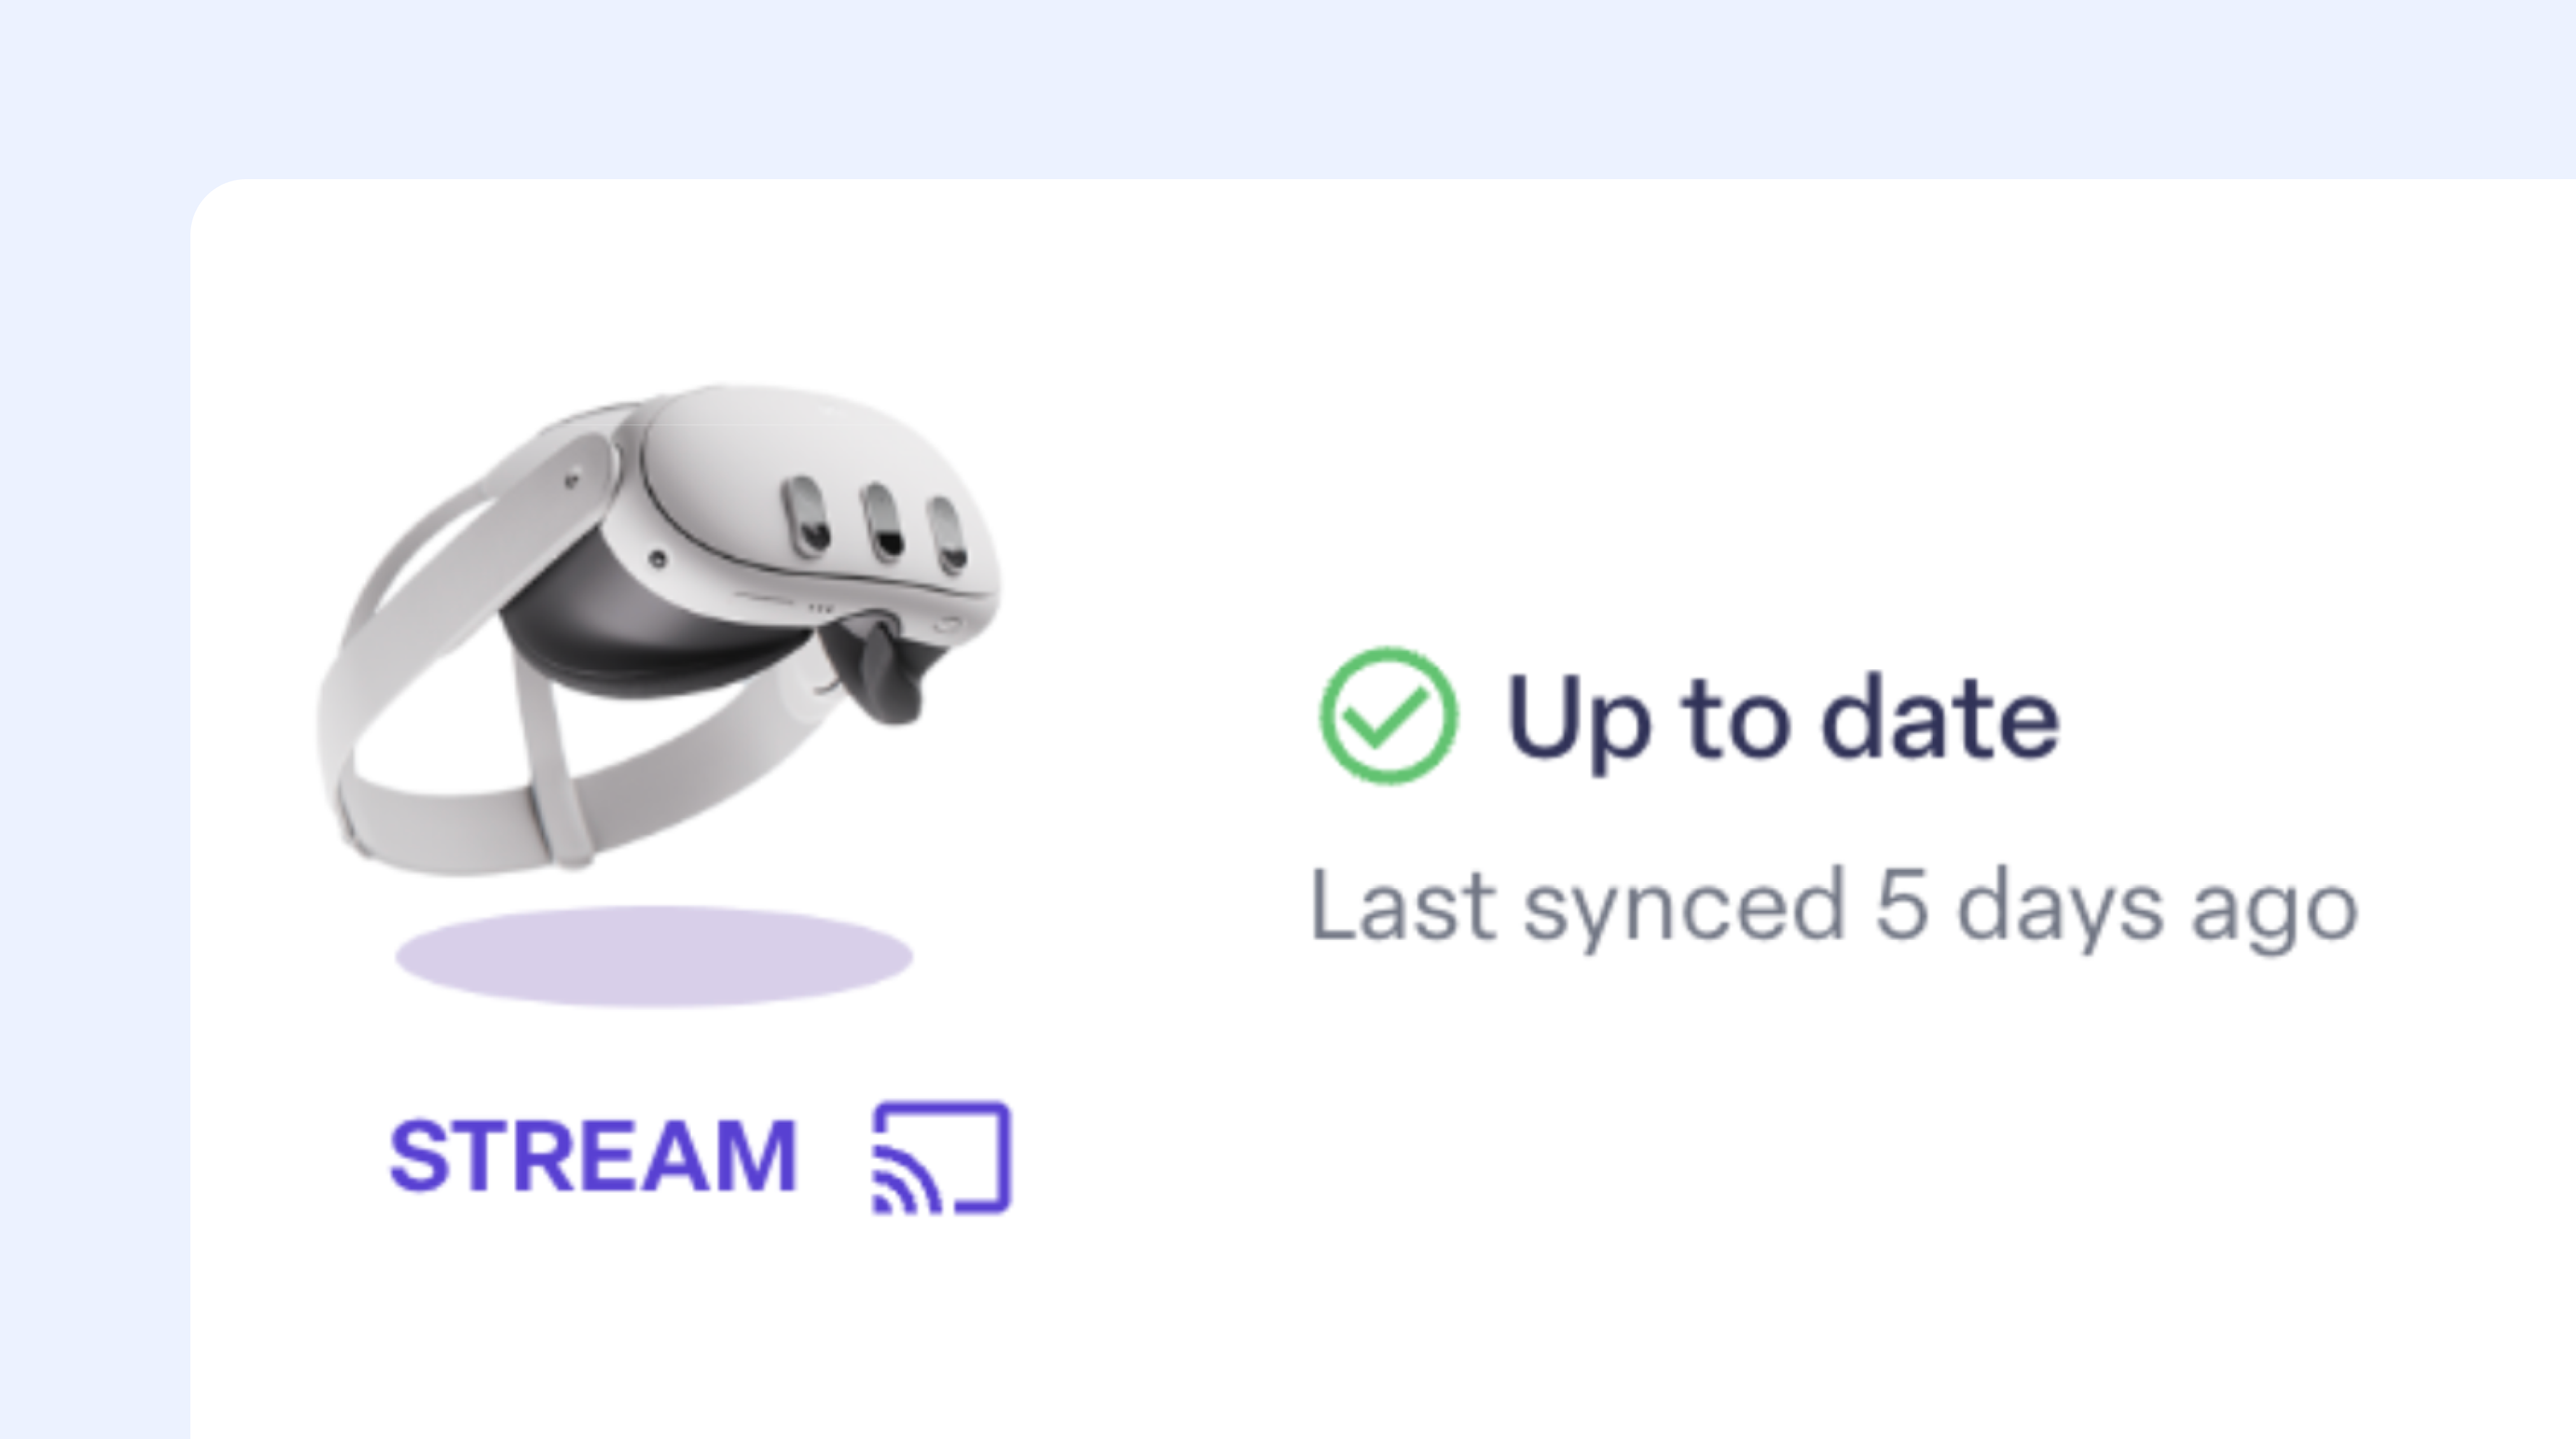
Want to see what your users are seeing in real time? Use Remote Screen Streaming to observe headset activity live from the ManageXR dashboard.
Simply go to your Device profile and click Stream. The device must be online to stream its screen. Then, a permission request will populate in the headset to allow the device to display its screen. Once the request is accepted, you’ll see a live feed of what’s happening inside the headset.
Lead Guided VR Sessions with Rooms
Rooms is our easy-to-use tool for guiding VR classrooms, training sessions, and events. You can view all participant screens in one dashboard and start any app or experience across all headsets at once.
- Prepare your Room
To create a Room, navigate to the "Rooms" tab in the ManageXR console. Then, click “+ Create Room.” Give your Room a name to keep things organized. It will be saved automatically so you can return to it later.
Next, select the devices you want to include in the Room. These are the devices you’ll be able to monitor in real time. You can filter the device list by tag or configuration to easily find and select your devices for your Room.

- Choose what your users will do in your Room
Select a starting activity for your users. When you launch your Room, this activity will automatically open on all users’ devices. If you prefer, you can leave the activity unassigned and let users choose their own VR experience.

- Launch your Room
Click “Start Room.” Your Room will open in a new window for easy monitoring. Click “Start Now” when ready.
If you didn’t select a starting activity, the Room will default to “Participant Choice”, allowing users to choose from any activity available on their device.


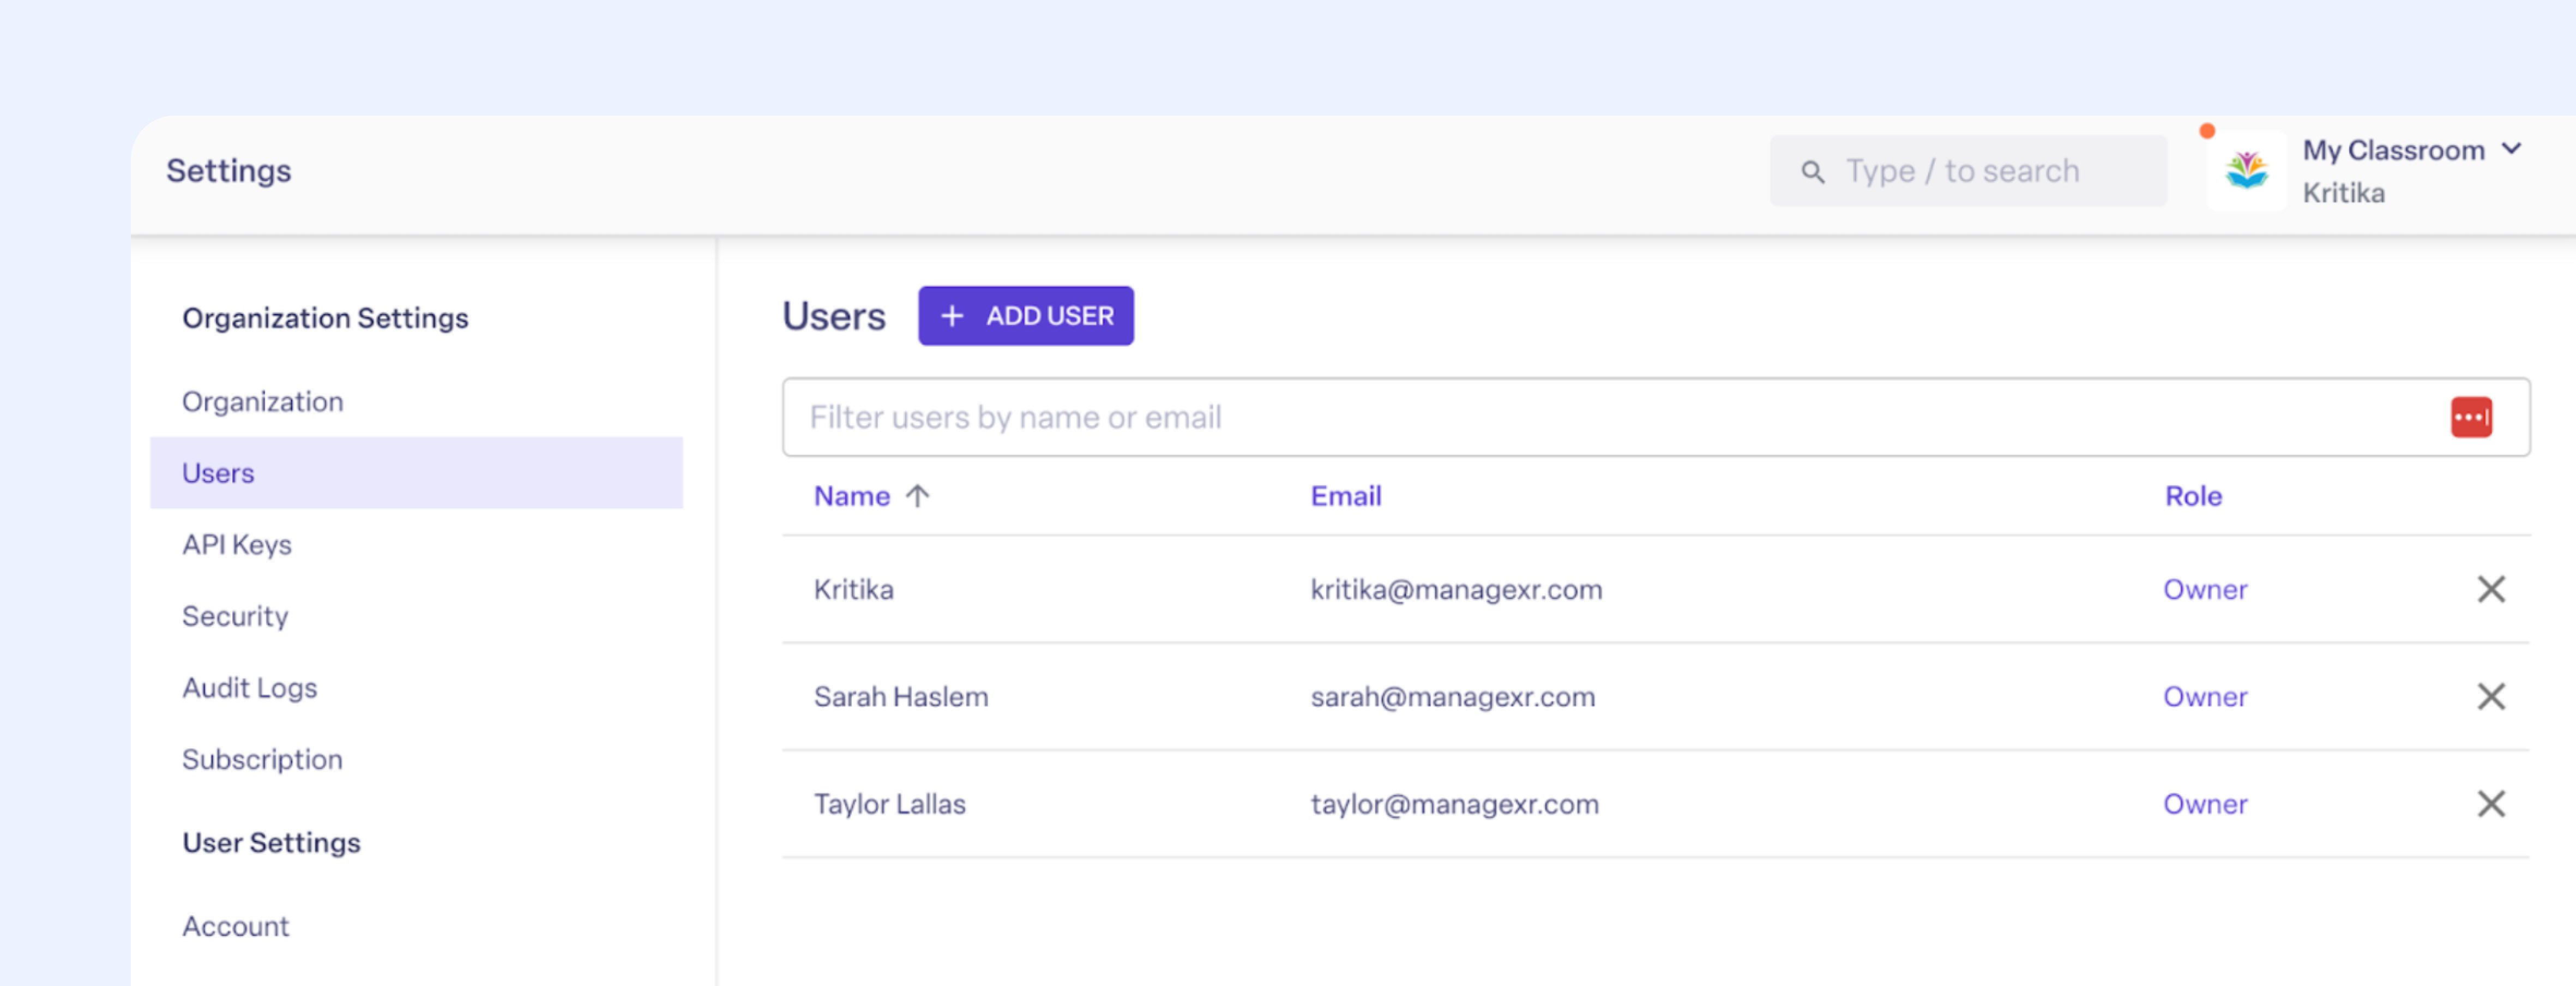
User Roles and Permissions
As your team grows, you’ll want to assign the right roles and permissions to your team members.
ManageXR provides several user roles to help you control platform access:
Viewer: Users who only need a birds-eye view of the platform and basic access.
Developer: Users who need to edit and upload content but don't decide what content gets deployed to devices.
Manager: Users that play a hands-on role in ensuring the success of your deployment. This user will often manage what content is being deployed to your end-users through configuration management.
Admin: Users that need access to all Manager functions and will often be adding/removing other users from the organization.
Owner: Users that need access to all Admin functions and will also own billing for the organization.
Custom: Users with specialized job functions, e.g., only need to log in to edit payment methods or download analytics charts.
To manage user roles, go to Organization Settings > Team Members and invite users or remove existing ones.
Release Channels
If your XR program pushes updates to your XR applications regularly, you’ll want to consider using Release Channels to keep your apps organized.
Application Release Channels are a distribution tool that simplifies and centralizes application versioning and updating. They create a layer of abstraction between specific app versions and the intended audience for that version.
When you begin to manage multiple app versions on multiple configurations, you should consider using Release Channels. Then, as your app evolves, rather than updating each of your configurations with the new app version, you can instead update the app's Release Channel.
With Release Channels, you can streamline and centralize the application update process:
- Make version changes in one place that apply to all your configurations and organizations.
- Save time deploying new versions of content and software.
- Simplify management using Release Channels as a single source of truth for application versions.
This is especially useful for managing large deployments and minimizing disruption during updates.
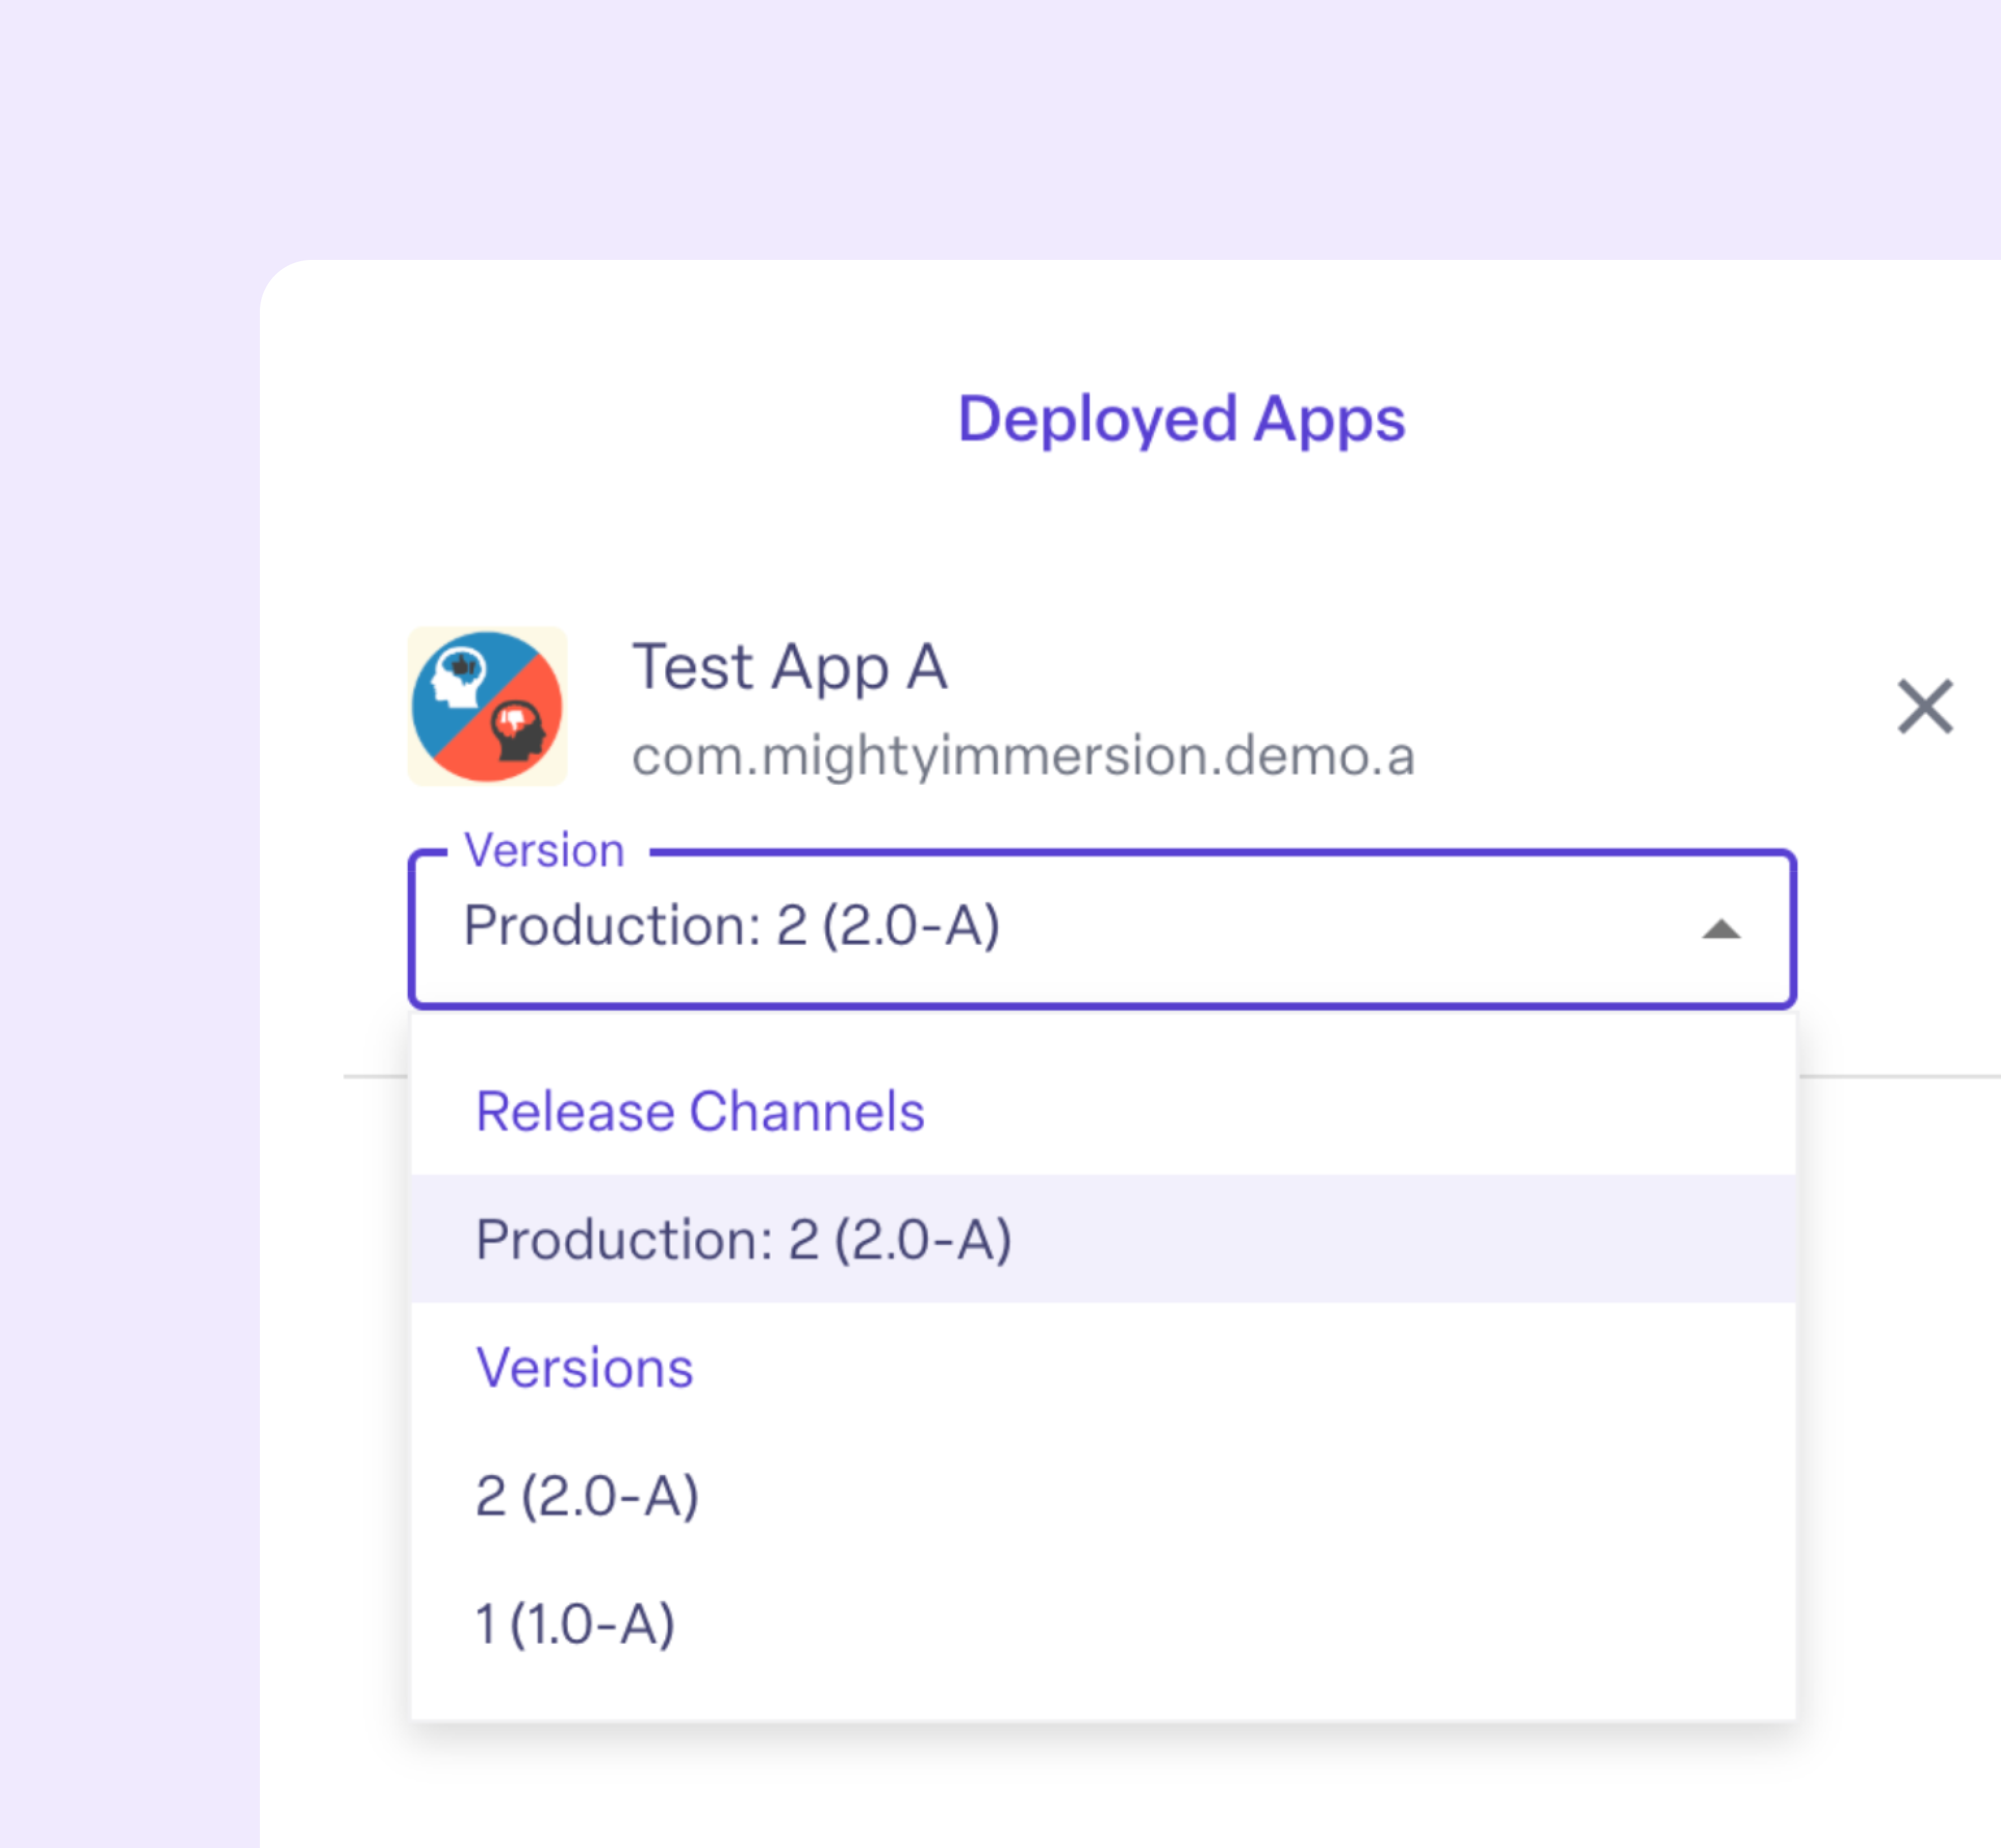
To see Release Channels in action, download Version 2 of Test App A and upload the version to Test App A in your VR content library. This simulates having multiple versions of an application as your team pushes updates.
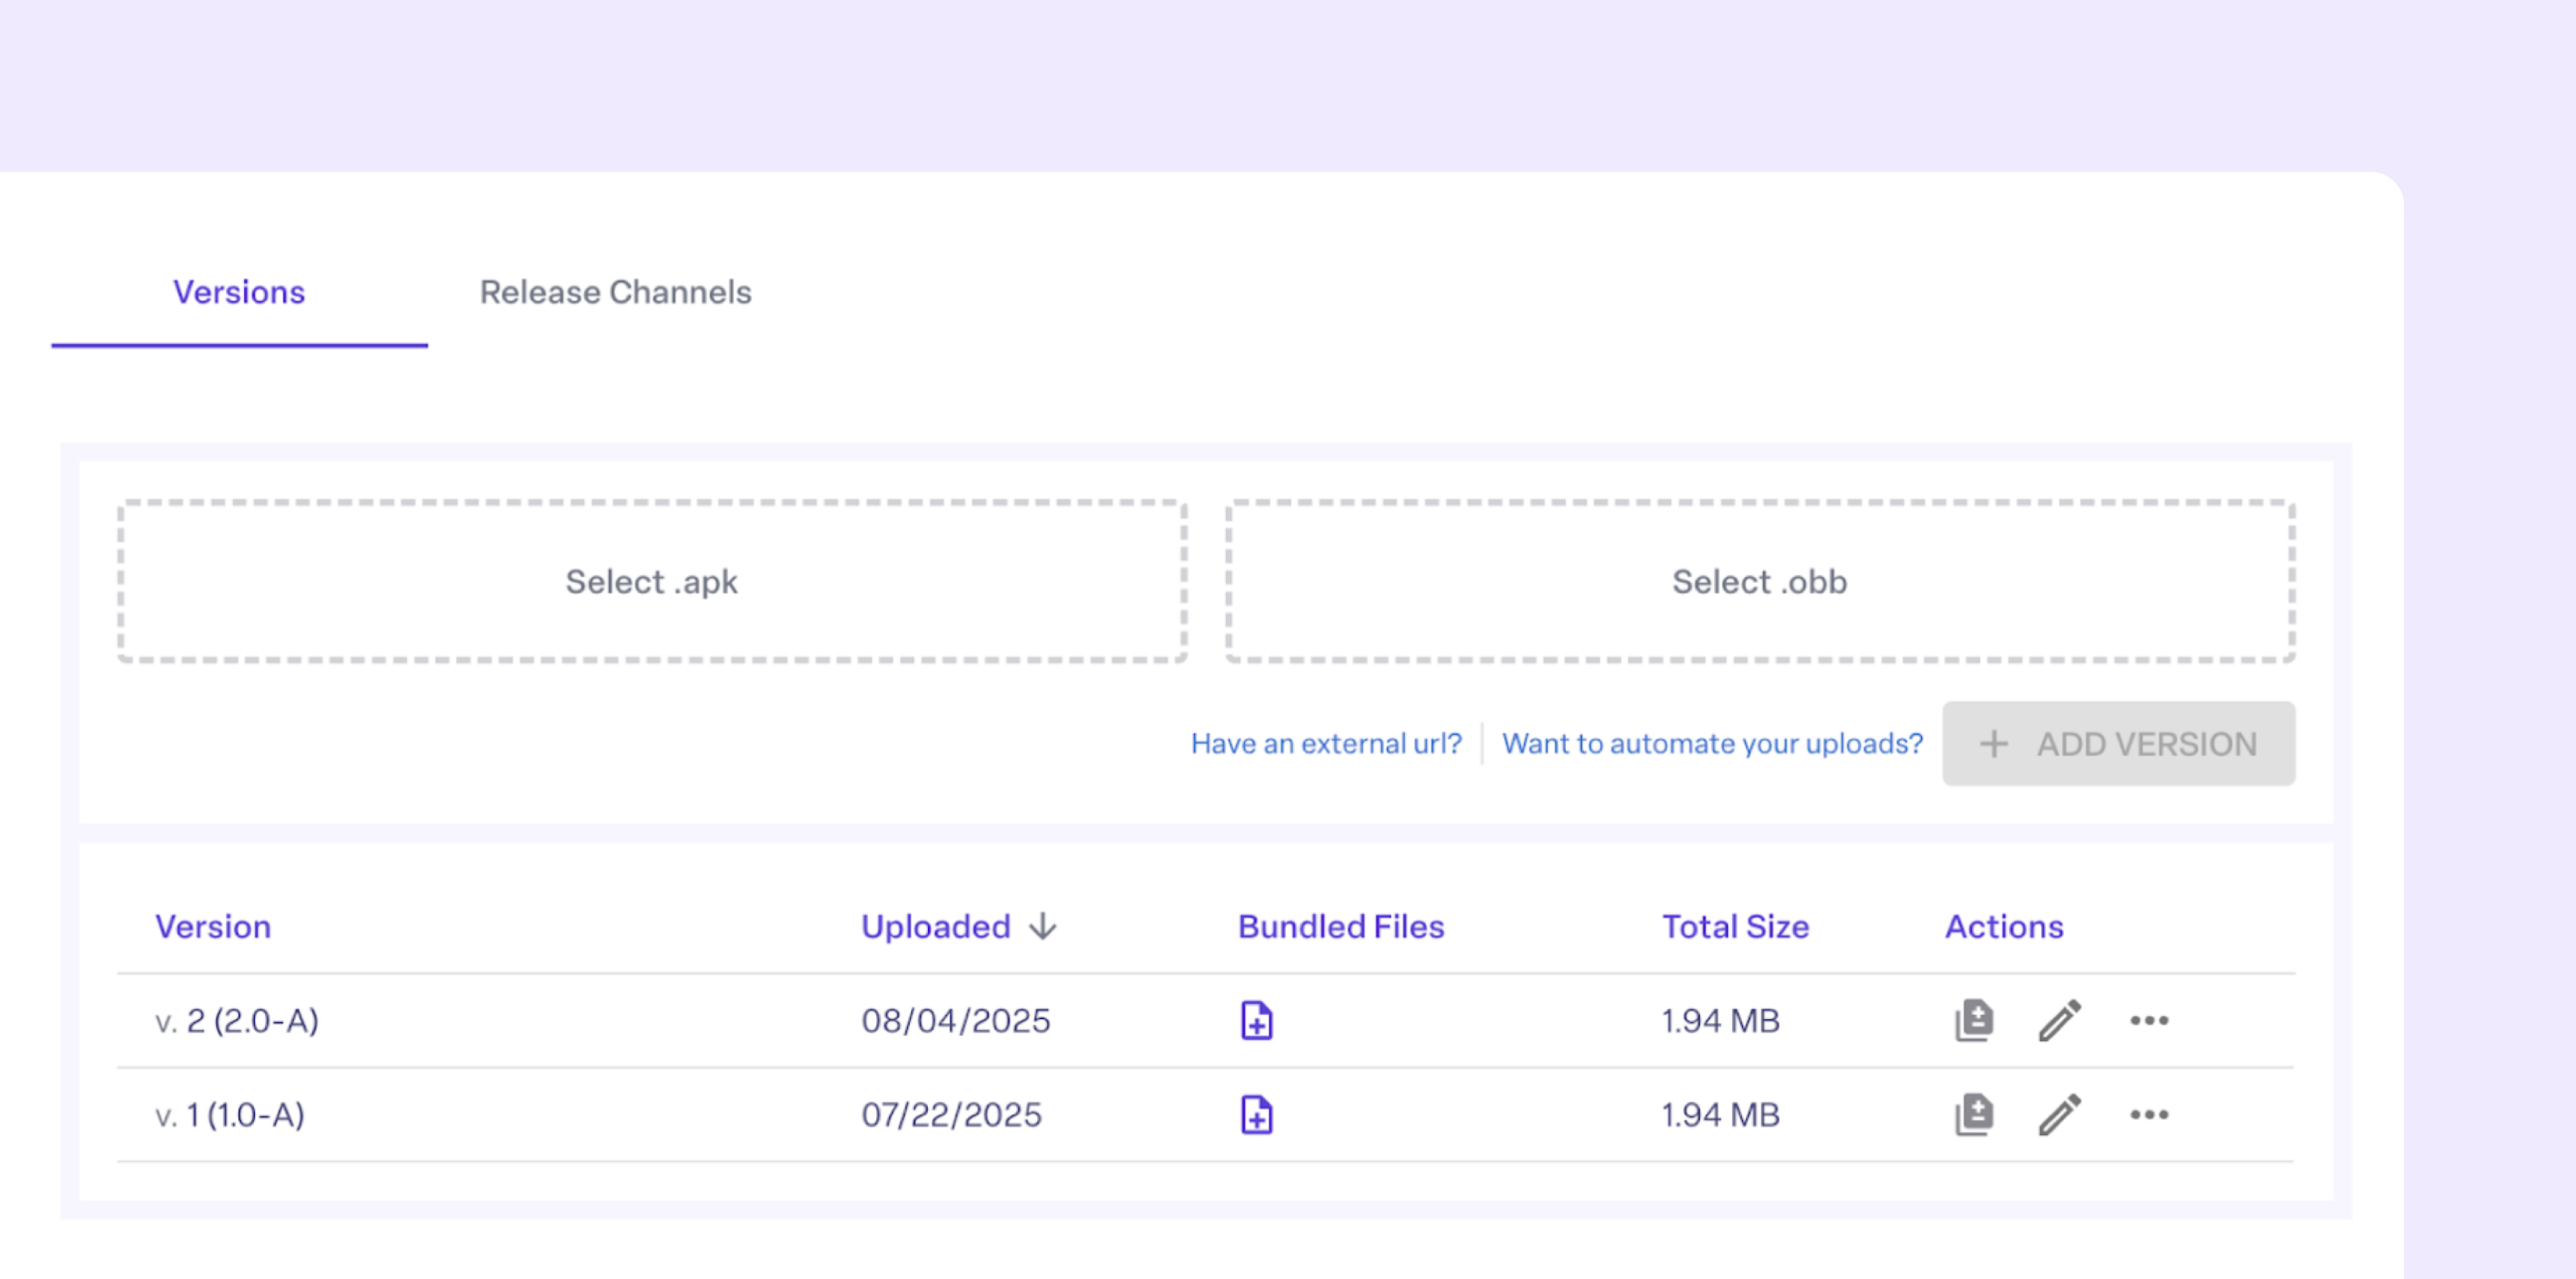
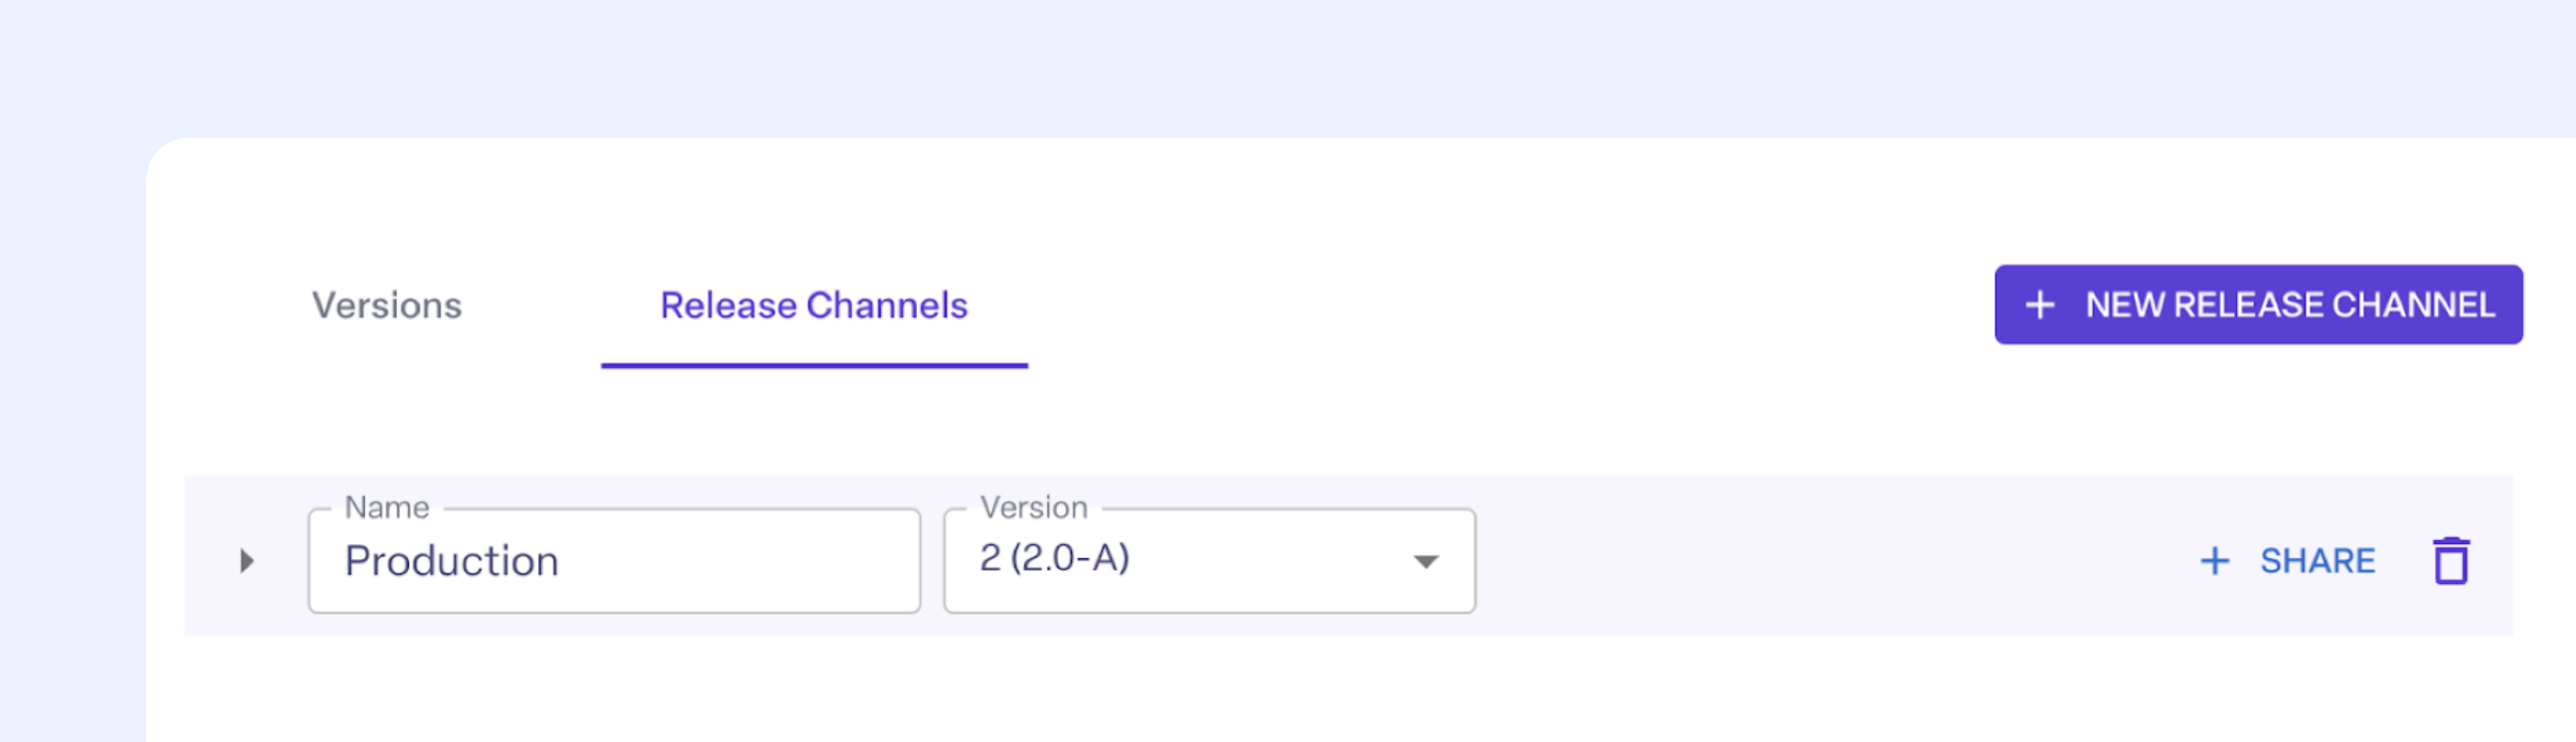
Then, navigate to the Release Channels tab. Create a new release channel and name it “Production”, selecting version 2 as the target version. You can return to your “Get Started with ManageXR” configuration, navigate to “Apps” and select “Production” as the release channel that you want to deploy Test App A through.
Why is this useful? Say you have multiple configurations with Test App A and you need to upload a new version of Test App A to each configuration. Now, you can simply update the release channel’s target version rather than individually updating each configuration.
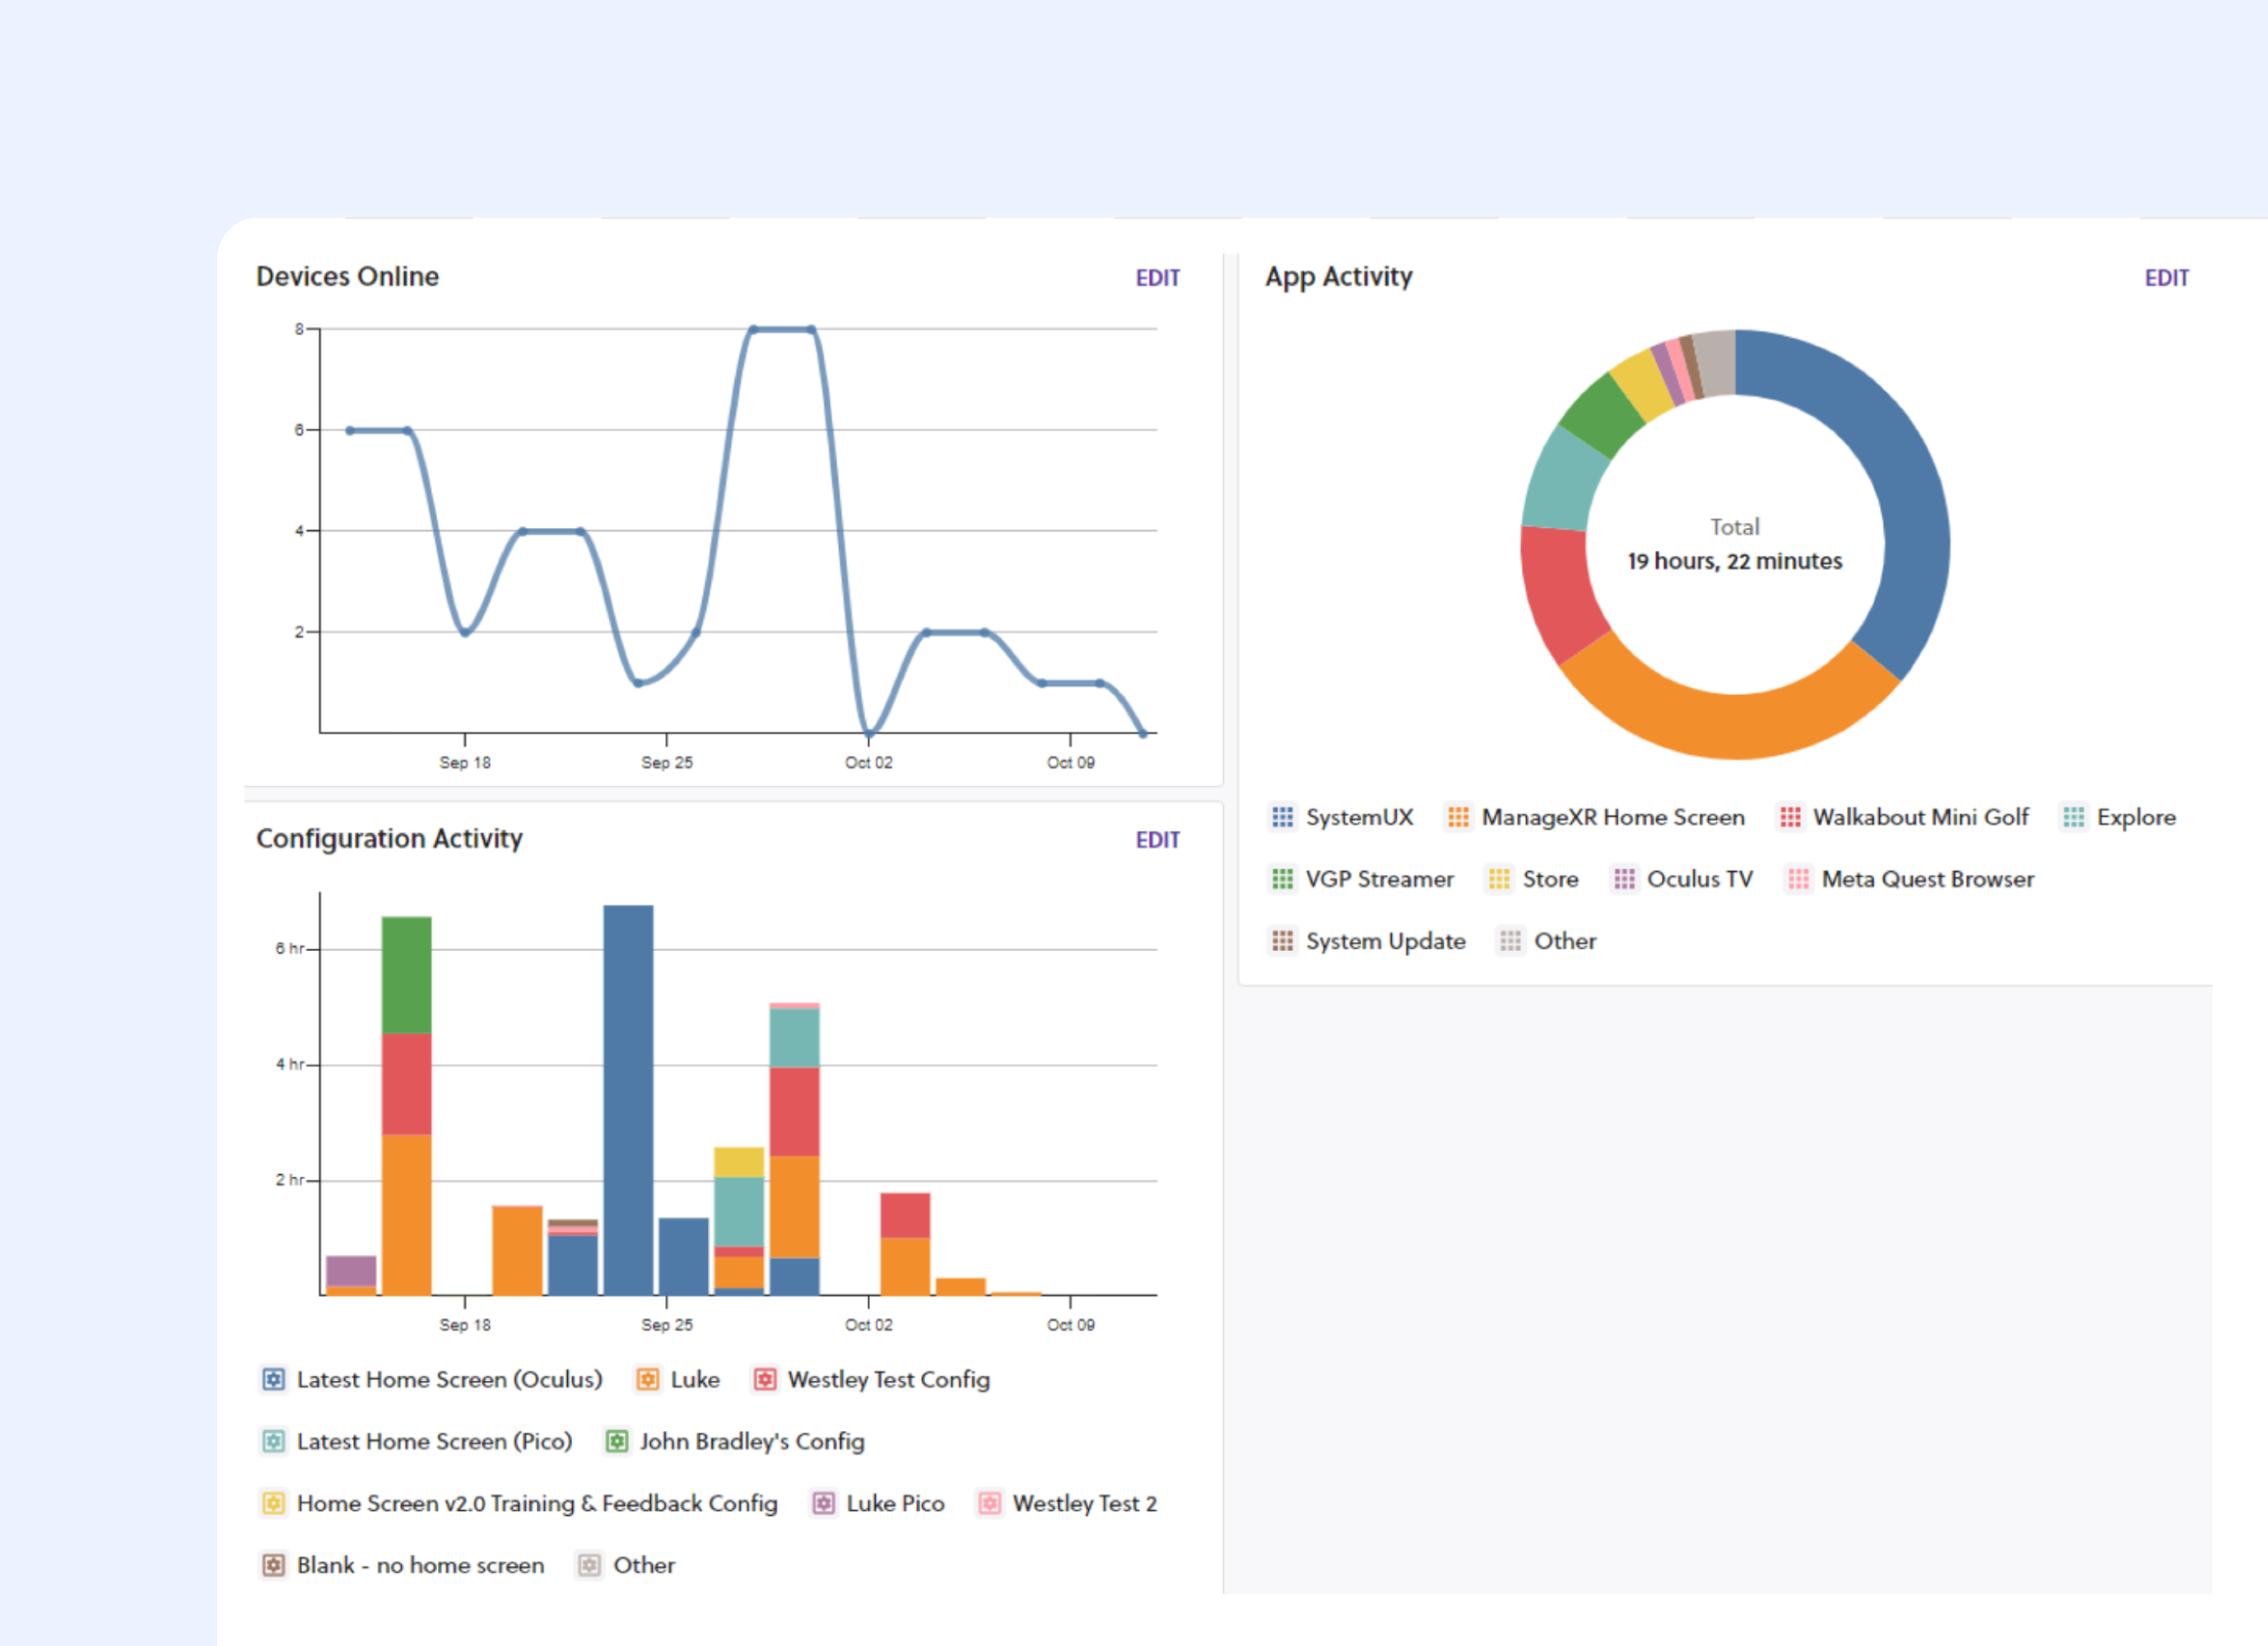
Device Analytics
The Analytics dashboard helps you visualize this data to better answer your most pressing questions about your fleet's activity. By default, your Analytics dashboard will come with three pre-configured charts: Devices Online, App Activity, and Configuration Activity.
These insights help you optimize content, prove ROI, and understand your XR program.
If you’re interested in even more unique insights, like analyzing user behaviors or tracking deeper aggregate insights, we recommend exploring Cognitive3D.
Conclusion
Congratulations! You’ve just completed the Get Started with ManageXR guide!
You now have the foundation you need to start managing XR devices at scale. From building configurations, deploying apps, customizing the user experience, and leveraging powerful tools like remote commands and analytics, you’ve seen how ManageXR simplifies every stage of an XR deployment.
Whether you’re managing a few devices or thousands, you can now:
- Reduce hands-on setup time
- Remotely deploy and update content
- Customize devices to meet your needs
- Support users in real-time
- Track usage and prove program impact
As your XR program grows, ManageXR scales with you, giving you the tools and confidence to manage any deployment, anywhere.
ManageXR is here to support you throughout the setup process and beyond. Use our Help Center to find answers to specific questions or chat with our support team directly.
FAQs
Do I need to keep my devices online for ManageXR to work?
Devices don’t need to be online at all times, but they must be connected to the internet to receive updates to apps and configurations, and to use remote commands. Offline devices will apply changes once they reconnect.
What types of XR content can I upload to ManageXR?
ManageXR supports APK files, 180/360° videos, WebXR links, and additional file types like images and documents that XR apps might require.
Can I manage devices from different manufacturers in the same dashboard?
Yes! ManageXR supports devices from major XR manufacturers, including Meta, PICO, HTC, and more. You can manage your entire fleet in one unified dashboard. See the full list of supported devices here.
What happens if I update a configuration while a device is offline?
No problem. Once the device reconnects to the internet, it will automatically receive the latest version of the configuration.
Can I undo a configuration update or remote command?
Some actions (like syncing) are reversible by updating the configuration again. Others (like factory reset) are permanent. Always check before launching commands that alter the device state.
What if I want to give a teammate access, but limit what they can do on ManageXR?
You can assign them a role with specific permissions. Use predefined roles like Viewer, Developer, Manager, or Admin, or create a custom role to fit their needs.
How do I manage application updates across multiple configurations?
Use Release Channels. They let you centralize app versioning and push updates to multiple configurations in one step.
How long does it take for a configuration change to show up on my device?
If your device is online, most changes (like updating settings) are applied within a few seconds. Larger updates, such as adding a new app, can take longer depending on the file size. You can also use the “Sync” remote command to force an immediate update.You can track progress of updates to devices in the ManageXR console.
Is screen streaming always on?
No. Streaming must be initiated from the dashboard and requires the end user to approve the stream from inside the headset.
What support do I have during my free trial?
You have access to our Help Center, support team, and onboarding materials. If you need extra help, reach out via the in-app support chat or contact us at support@managexr.com.


